BeagleBone
Introduction
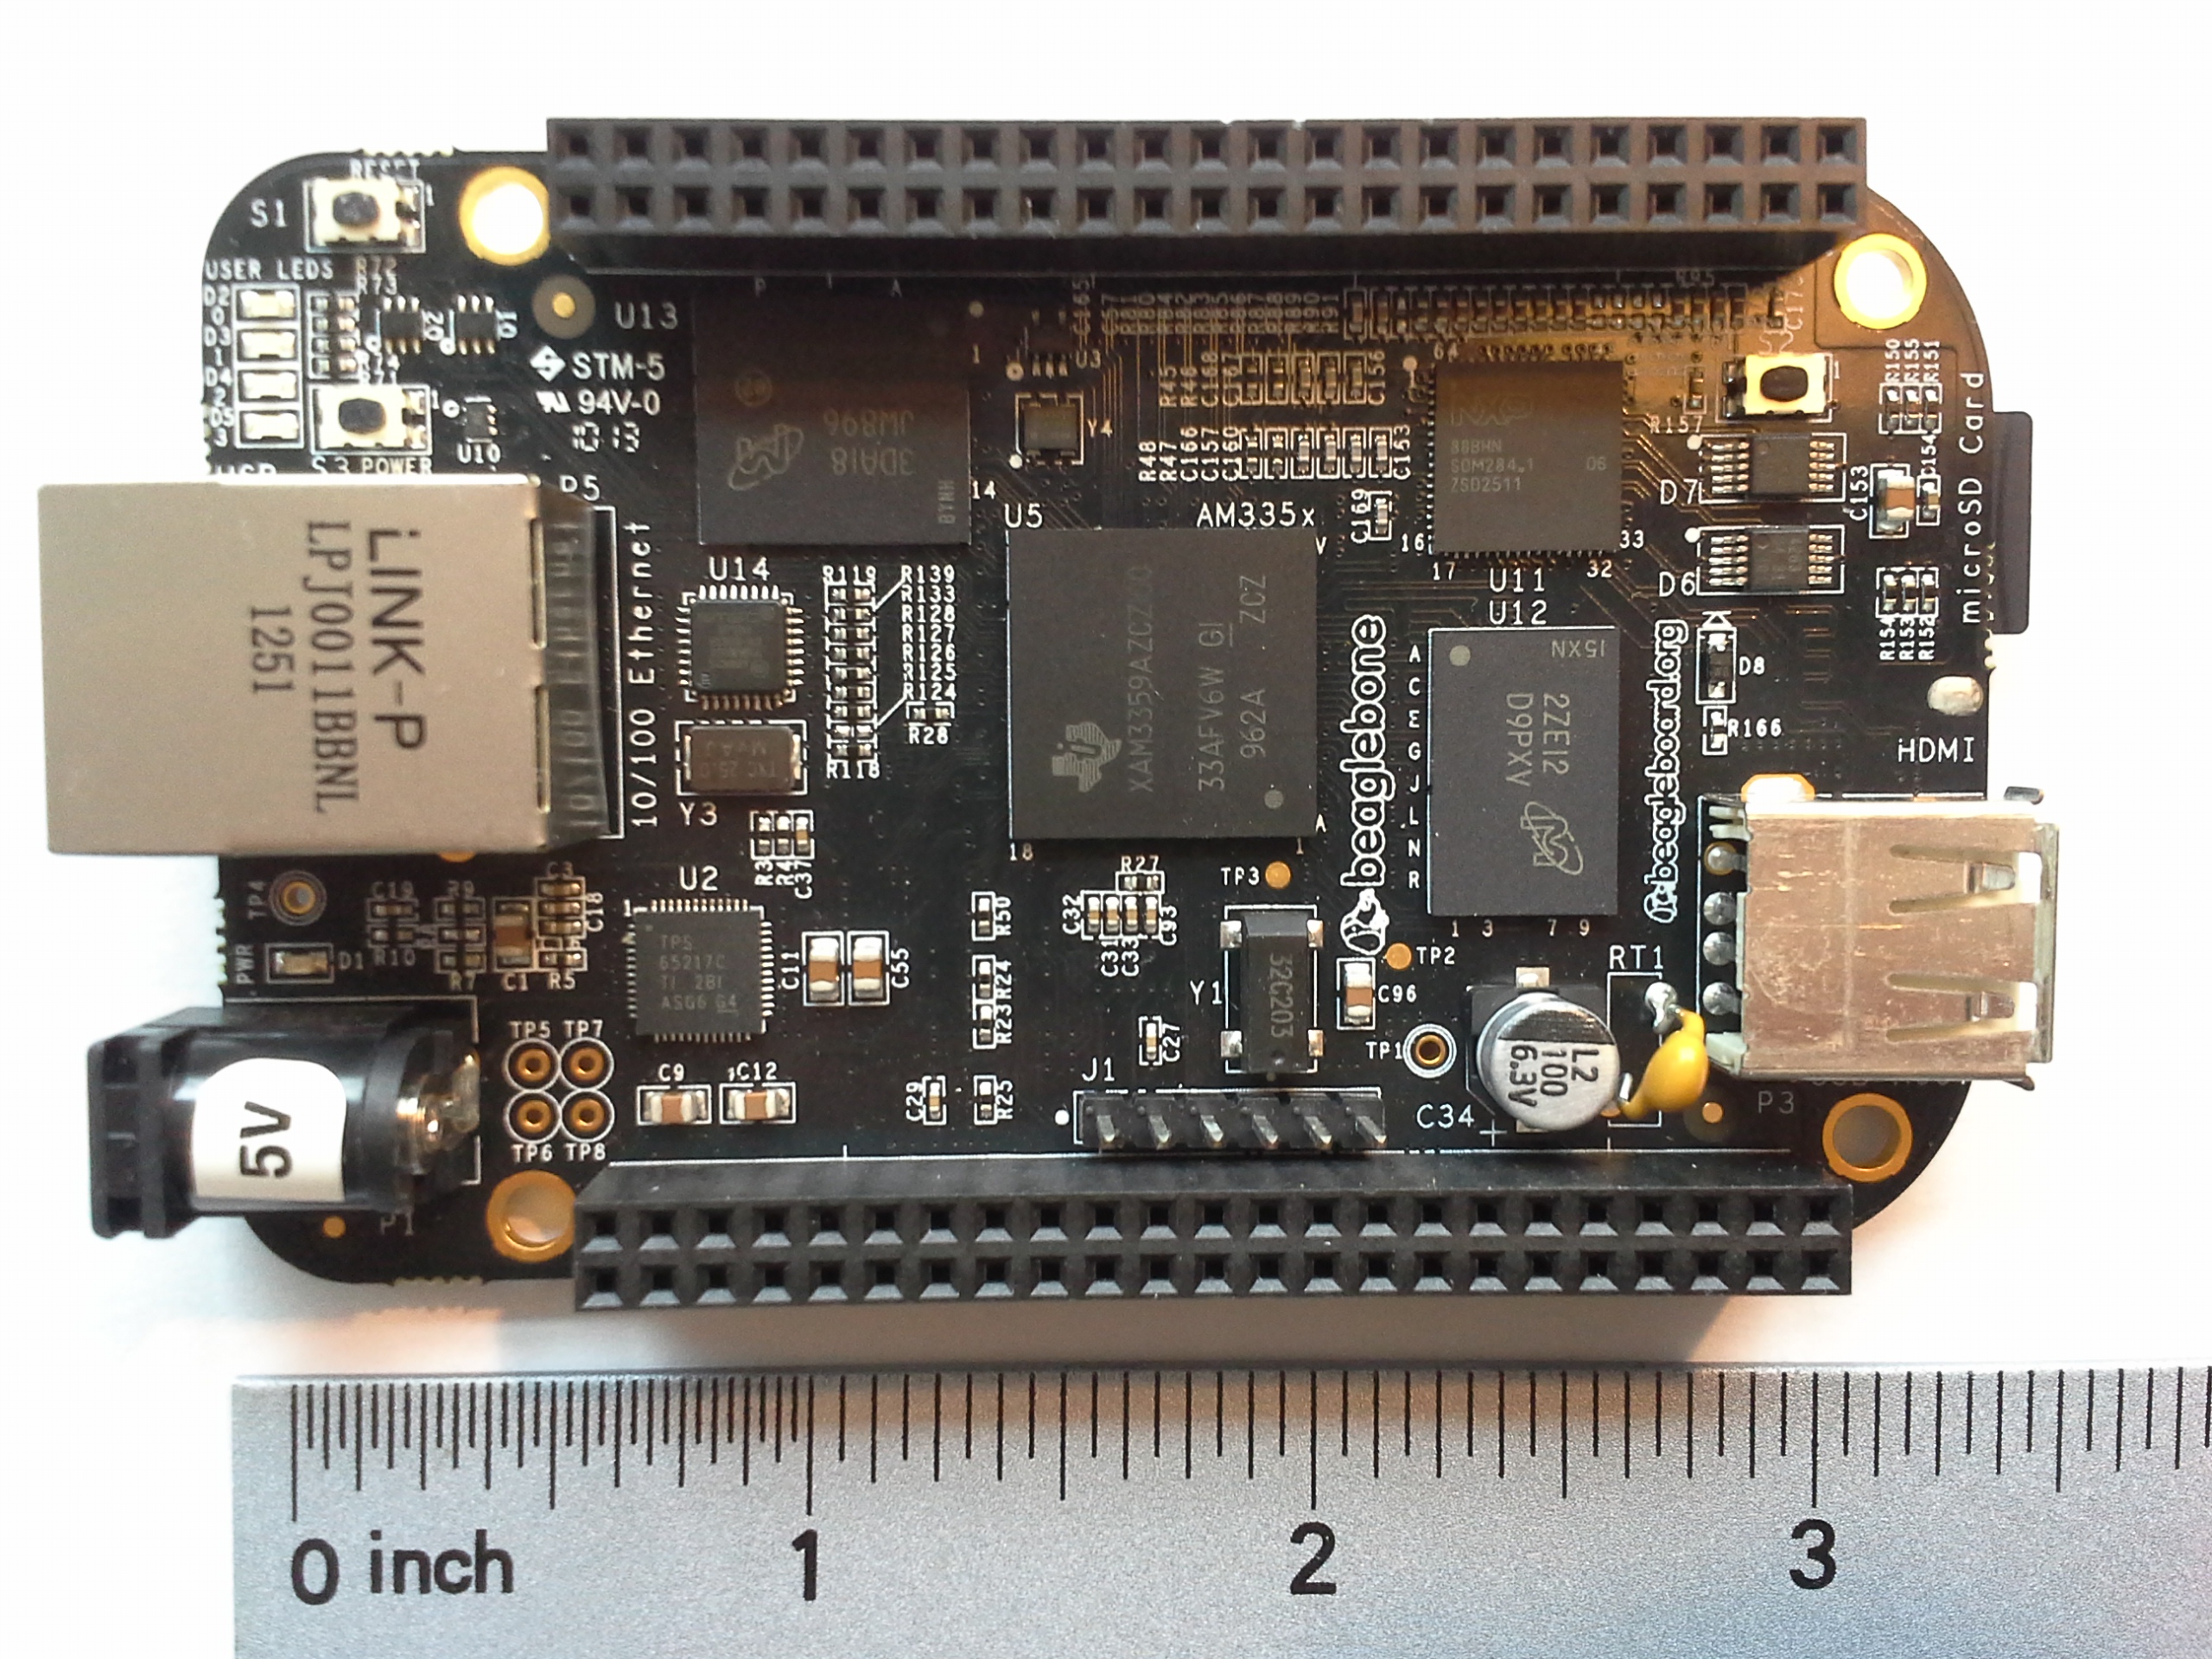 The BeagleBone is like a combination between a microcontroller (like Arduino) and a small Linux desktop. It is most similar to a Raspberry Pi, but with more pinouts and a faster processor. The BeagleBone has several variants, the most recent edition being the BeagleBone Black (aka BBB), which retails for $45 USD.
It is a great choice if you are going to add image or video processing to your robot. An Arduino is nowhere near powerful enough to handle images. Arduino, however, is extremely easy to use and extremely well documented with a massive community.
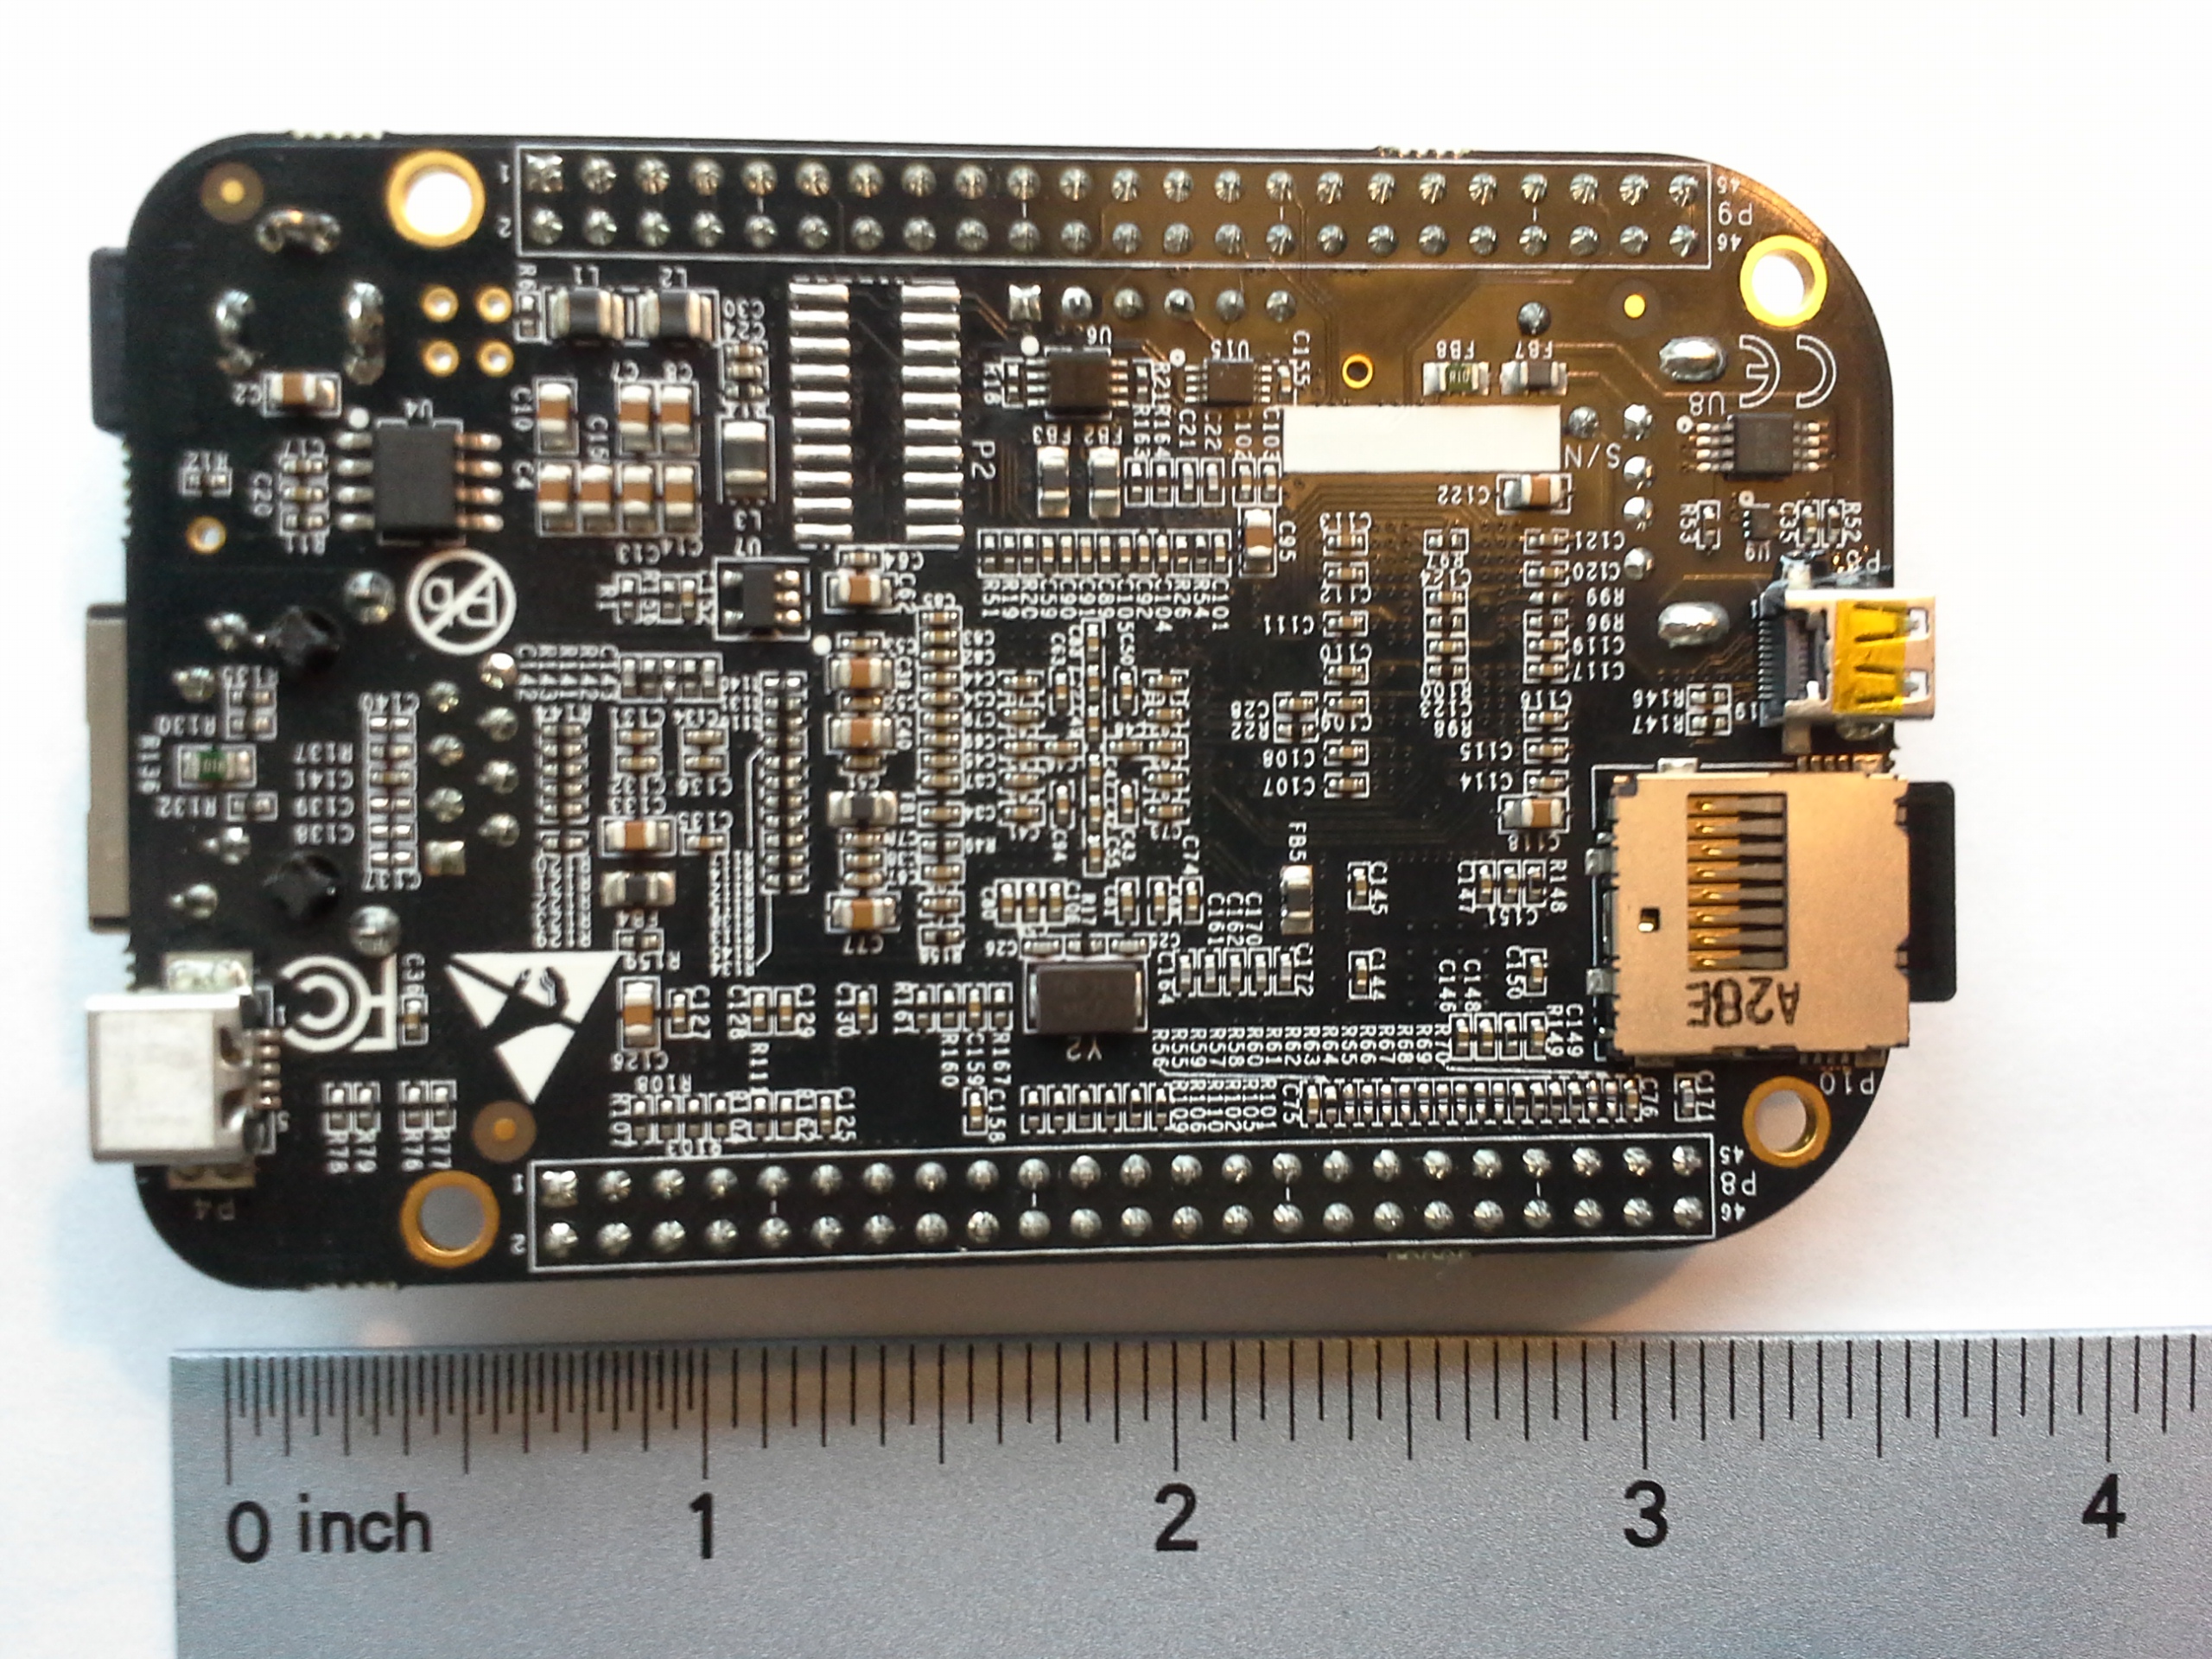 Against a Raspberry Pi, it's a harder choice to make. It's more expensive, but has a processor that's faster and capable of running ARMv7 operating systems like Ubuntu and Android, where a Raspberry Pi is substantially more limited. A Raspberry Pi is easier to use and has a much larger community behind it, but the BeagleBone has some powerful hardware features. If you are undecided, the good news is that they are both really cheap, both run Python, and have very similar ways of accessing GPIO (the /sys/ directory), so really you could change your mind midway through a project and not face too much of a setback.
BeagleBone Black with Angstrom
Introduction
Angstrom Linux is what ships on the BeagleBones. It's kind of terrible because I think everyone when they first get it will say, oh I should run opkg upgrade so that everything is up to date. Guess what? That breaks the boot. It won't startup anymore. I don't know how to fix it or what goes wrong. You'll get three LED's on, no USB connection on either the mass media or network, and it'll never come online on the LAN because it won't start up.
If you want things to be up to date, you may want to install Ubuntu.
On the other hand, it is pretty lightweight and is pre-configured in a lot of ways that other distros don't have by default. For example, the cloud9 editor is kind of nice.
Installing Images
Whether you have a BeagleBone or BeagleBone Black, you can use the Angstrom-Cloud9-IDE-GNOME-eglibc-ipk*.img.xz
They both run ARM7 and the image has the NEON optimization. The image for the BeagleBone Black might have additional features, but it's the same Angstrom with less features as far as I can tell.
sudo su
xz -cd ./Angstrom-Cloud9-IDE-GNOME-****.img.xz > /dev/sdd
URLs
Check out the tutorial page on http://beaglebone.local/. There are some neat node.js buttons on http://beaglebone.local/bonescript.html
The very cool Cloud9 IDE is available on http://beaglebone.local:3000/.
If you're on windows and don't have an SSH client that you like, there's GateOne SSH client availble in-browser at https://beaglebone.local/
If those URLs don't work, then you might try replacing beaglebone.local with 192.168.7.2. If that doesn't work, there might be something wrong with your installation. You could re-flash another image.
Tweaks
Disable GNOME autostart
If you want a graphical environment to develop and test on, that's fine, but a lot of the time your deployment will be headless. Well, you can have your cake and eat it too.
update-rc.d -f gdm remove
systemctl disable gdm
mv /lib/systemd/system/gdm.service ~/gdm.backup.service
systemctl --system daemon-reload
There are probably more steps there than are necessary, but I couldn't get it to stay down for a while, so try them all.
Then if you want to start your graphical environment at any point, just login and run gdm
Install locate
Locate is an awesome tool for searching the filesystem really quickly.
opkg install findutils
updatedb
Run a Script on Startup (cron)
nano ~/startup.sh#put something in /tmp/ so we can see if this ran
touch /tmp/WINNING
#turn off the heartbeat
echo 0 > /sys/class/leds/beaglebone\:green\:usr0/brightnesschmod +x ~/startup.sh
env EDITOR=nano crontab -e
@reboot /bin/bash /home/root/startup.shRun a Script on Startup (systemd)
Angstrom uses systemd, so it has a few things different than a Debian/Ubuntu system. Not sure why you'd want to do it this way. It's a lot harder than cron.
First make a script you want to run on startup. You might just use this bash file to launch all your other processes. If you do, throw a & at the end of each line to run them in background.
nano ~/mystartup.sh#!/bin/bash
touch /tmp/WINNINGchmod +x ~/mystartup.shAfter making an executable script, make a service for systemd to use.
nano /lib/systemd/system/mystartup.service[Unit]
Description=My own script to run on startup
ConditionPathExists=|/usr/bin
After=local-fs.target
[Service]
Type=oneshot
ExecStart=/home/root/mystartup.shsystemctl --system daemon-reload
systemctl enable mystartup.serviceTo load it and test it, try:
systemctl start mystartup.service
ls -l /tmp/WINNING
journalctl
Note that journalctl is apparently the new way of doing a "less /var/log/syslog"
Benchmarks
Compare the benchmarks to those of the Raspberry Pi (wiki) using this package (zip). Also compare to my Ubuntu BBB tests.
Processor Info
root@beaglebone:~# cat /proc/cpuinfo
processor	: 0
model name	: ARMv7 Processor rev 2 (v7l)
BogoMIPS	: 990.68
Features	: swp half thumb fastmult vfp edsp thumbee neon vfpv3 tls
CPU implementer	: 0x41
CPU architecture: 7
CPU variant	: 0x3
CPU part	: 0xc08
CPU revision	: 2

Hardware	: Generic AM33XX (Flattened Device Tree)
Revision	: 0000
Serial		: 0000000000000000
Dhrystone
At 3059570 dhrystones per second, the BBB with Angstrom is almost 4 times faster than a Raspberry Pi (809061) with Raspbian on it. However, it is about 10% slower than it could be with Ubuntu on it (3319960).
##########################################

Dhrystone Benchmark, Version 2.1 (Language: C or C++)
Optimisation    Opt 3 32 Bit
Register option not selected

       10000 runs   0.01 seconds
      100000 runs   0.11 seconds
      200000 runs   0.18 seconds
      400000 runs   0.13 seconds
      800000 runs   0.26 seconds
     1600000 runs   0.52 seconds
     3200000 runs   1.05 seconds
     6400000 runs   2.09 seconds

Final values (* implementation-dependent):

Int_Glob:      O.K.  5  Bool_Glob:     O.K.  1
Ch_1_Glob:     O.K.  A  Ch_2_Glob:     O.K.  B
Arr_1_Glob[8]: O.K.  7  Arr_2_Glob8/7: O.K.     6400010
Ptr_Glob->              Ptr_Comp:       *    94584
  Discr:       O.K.  0  Enum_Comp:     O.K.  2
  Int_Comp:    O.K.  17 Str_Comp:      O.K.  DHRYSTONE PROGRAM, SOME STRING
Next_Ptr_Glob->         Ptr_Comp:       *    94584 same as above
  Discr:       O.K.  0  Enum_Comp:     O.K.  1
  Int_Comp:    O.K.  18 Str_Comp:      O.K.  DHRYSTONE PROGRAM, SOME STRING
Int_1_Loc:     O.K.  5  Int_2_Loc:     O.K.  13
Int_3_Loc:     O.K.  7  Enum_Loc:      O.K.  1
Str_1_Loc:                             O.K.  DHRYSTONE PROGRAM, 1'ST STRING
Str_2_Loc:                             O.K.  DHRYSTONE PROGRAM, 2'ND STRING


From File /proc/cpuinfo
processor	: 0
model name	: ARMv7 Processor rev 2 (v7l)
BogoMIPS	: 297.40
Features	: swp half thumb fastmult vfp edsp thumbee neon vfpv3 tls
CPU implementer	: 0x41
CPU architecture: 7
CPU variant	: 0x3
CPU part	: 0xc08
CPU revision	: 2

Hardware	: Generic AM33XX (Flattened Device Tree)
Revision	: 0000
Serial		: 0000000000000000


From File /proc/version
Linux version 3.8.13 (koen@rrMBP) (gcc version 4.7.3 20130205 (prerelease) (Linaro GCC 4.7-2013.02-01) ) #1 SMP Mon May 20 17:07:58 CEST 2013


Nanoseconds one Dhrystone run:       326.84
Dhrystones per Second:              3059570
VAX  MIPS rating =                  1741.36
OpenSSL
Again, the BBB on Angstrom proves to be significantly faster than the Raspberry Pi. About 4 times faster or way more. However, the comparison to the BBB with Ubuntu are actually the opposite. Angstrom is faster by about 10%. The difference? No NEON FPU optimizations on Ubuntu!
root@beaglebone:~# openssl speed;
OpenSSL 1.0.0j 10 May 2012
built on: Wed Apr  3 21:06:55 CEST 2013
options:bn(64,32) rc4(ptr,int) des(idx,risc1,2,long) aes(partial) idea(int) blowfish(idx)
compiler: arm-angstrom-linux-gnueabi-gcc  -march=armv7-a     -mthumb-interwork -mfloat-abi=softfp -mfpu=neon -mtune=cortex-a8 --sysroot=/build/v2012.12/build/tmp-angstrom_v2012_12-eglibc/sysroots/olinuxino-a13 -fPIC -DOPENSSL_PIC -DOPENSSL_THREADS -D_REENTRANT -DDSO_DLFCN -DHAVE_DLFCN_H -DL_ENDIAN 	-DTERMIO -O2 -pipe -g -feliminate-unused-debug-types -Wall -DHAVE_CRYPTODEV -DUSE_CRYPTODEV_DIGESTS
The 'numbers' are in 1000s of bytes per second processed.
type             16 bytes     64 bytes    256 bytes   1024 bytes   8192 bytes
md2                  0.00         0.00         0.00         0.00         0.00
mdc2              2200.18k     2903.10k     3079.22k     3123.71k     3131.59k
md4               5415.82k    20091.55k    62372.30k   131555.57k   194939.46k
md5               4617.55k    16804.97k    50871.15k   102349.66k   145803.90k
hmac(md5)         7419.73k    25105.91k    67753.84k   117279.85k   149212.21k
sha1              4689.06k    15086.80k    37111.10k    58582.77k    70082.56k
rmd160            4321.96k    13657.71k    33189.03k    51514.42k    61322.19k
rc4              51274.46k    57055.08k    58599.86k    59068.36k    59196.82k
des cbc          15641.44k    16844.09k    17096.95k    17186.71k    17143.13k
des ede3          5966.27k     6118.46k     6149.65k     6173.80k     6179.74k
idea cbc         15220.99k    16040.11k    16331.43k    16378.86k    16340.16k
seed cbc         21797.27k    23300.32k    23793.27k    23880.09k    23956.81k
rc2 cbc          13306.59k    14101.91k    14234.37k    14302.09k    14325.00k
rc5-32/12 cbc        0.00         0.00         0.00         0.00         0.00
blowfish cbc     27004.49k    29706.03k    30572.82k    30746.37k    30866.58k
cast cbc         26993.30k    29720.81k    30501.50k    30798.77k    30854.70k
aes-128 cbc      27466.35k    29851.57k    30765.55k    31029.95k    31033.71k
aes-192 cbc      23934.83k    25819.16k    26408.67k    26625.71k    26651.49k
aes-256 cbc      21310.20k    22657.92k    23204.56k    23356.48k    23362.27k
camellia-128 cbc    28544.43k    31191.34k    31965.01k    32352.21k    32362.51k
camellia-192 cbc    23092.30k    24841.16k    25474.06k    25586.30k    25650.86k
camellia-256 cbc    23167.57k    24852.70k    25346.39k    25612.71k    25614.38k
sha256            4648.14k    11368.65k    21020.95k    26654.38k    29045.86k
sha512             969.92k     3858.49k     5574.64k     7650.79k     8548.17k
whirlpool         1872.39k     3901.80k     6372.60k     7553.37k     7996.82k
aes-128 ige      25801.92k    28261.82k    29148.35k    29319.28k    28924.91k
aes-192 ige      22733.70k    24548.07k    25245.12k    25323.28k    25036.29k
aes-256 ige      20328.61k    21757.95k    22204.79k    22366.69k    22090.91k
                  sign    verify    sign/s verify/s
rsa  512 bits 0.002286s 0.000191s    437.4   5244.1
rsa 1024 bits 0.011637s 0.000559s     85.9   1790.5
rsa 2048 bits 0.068425s 0.001828s     14.6    546.9
rsa 4096 bits 0.444783s 0.006260s      2.2    159.7
                  sign    verify    sign/s verify/s
dsa  512 bits 0.001946s 0.002152s    513.9    464.7
dsa 1024 bits 0.005539s 0.006413s    180.5    155.9
dsa 2048 bits 0.018094s 0.021652s     55.3     46.2
                              sign    verify    sign/s verify/s
 160 bit ecdsa (secp160r1)   0.0011s   0.0048s    935.6    210.4
 192 bit ecdsa (nistp192)   0.0011s   0.0052s    873.1    192.9
 224 bit ecdsa (nistp224)   0.0015s   0.0069s    679.8    144.8
 256 bit ecdsa (nistp256)   0.0020s   0.0099s    509.9    100.8
 384 bit ecdsa (nistp384)   0.0041s   0.0218s    245.0     45.8
 521 bit ecdsa (nistp521)   0.0093s   0.0490s    107.4     20.4
 163 bit ecdsa (nistk163)   0.0040s   0.0081s    247.2    124.2
 233 bit ecdsa (nistk233)   0.0078s   0.0154s    128.3     65.1
 283 bit ecdsa (nistk283)   0.0119s   0.0276s     84.3     36.2
 409 bit ecdsa (nistk409)   0.0283s   0.0632s     35.3     15.8
 571 bit ecdsa (nistk571)   0.0634s   0.1443s     15.8      6.9
 163 bit ecdsa (nistb163)   0.0040s   0.0087s    252.3    115.5
 233 bit ecdsa (nistb233)   0.0076s   0.0166s    130.8     60.3
 283 bit ecdsa (nistb283)   0.0118s   0.0302s     84.6     33.2
 409 bit ecdsa (nistb409)   0.0284s   0.0718s     35.2     13.9
 571 bit ecdsa (nistb571)   0.0637s   0.1660s     15.7      6.0
                              op      op/s
 160 bit ecdh (secp160r1)   0.0041s    246.8
 192 bit ecdh (nistp192)   0.0044s    229.8
 224 bit ecdh (nistp224)   0.0057s    174.7
 256 bit ecdh (nistp256)   0.0083s    121.1
 384 bit ecdh (nistp384)   0.0177s     56.6
 521 bit ecdh (nistp521)   0.0406s     24.6
 163 bit ecdh (nistk163)   0.0039s    255.5
 233 bit ecdh (nistk233)   0.0075s    132.8
 283 bit ecdh (nistk283)   0.0136s     73.6
 409 bit ecdh (nistk409)   0.0312s     32.1
 571 bit ecdh (nistk571)   0.0718s     13.9
 163 bit ecdh (nistb163)   0.0042s    236.7
 233 bit ecdh (nistb233)   0.0082s    121.3
 283 bit ecdh (nistb283)   0.0152s     65.7
 409 bit ecdh (nistb409)   0.0357s     28.0
 571 bit ecdh (nistb571)   0.0825s     12.1
BeagleBone Black with Ubuntu
Introduction
The BeagleBone Black is a very powerful and affordable microcontroller - superior to an Arduino Uno in a lot of ways. It's fast enough to be used as a desktop computer, yet it has more pinouts than an Uno. With the BeagleBone Black priced at $45, it's really a great value compared to an Arduino ($35) or even a Raspberry Pi ($35).
An Arduino, while power-efficient and reliable, is incapable of high performance use cases like image processing. Even the ARM based Arduino Due is thousands of times slower than the BeagleBone Black. It can't even parse a JPEG (the library won't fit in the flash). A BeagleBone or Raspberry Pi, however, can easily process live streams from USB webcams and OpenCV.
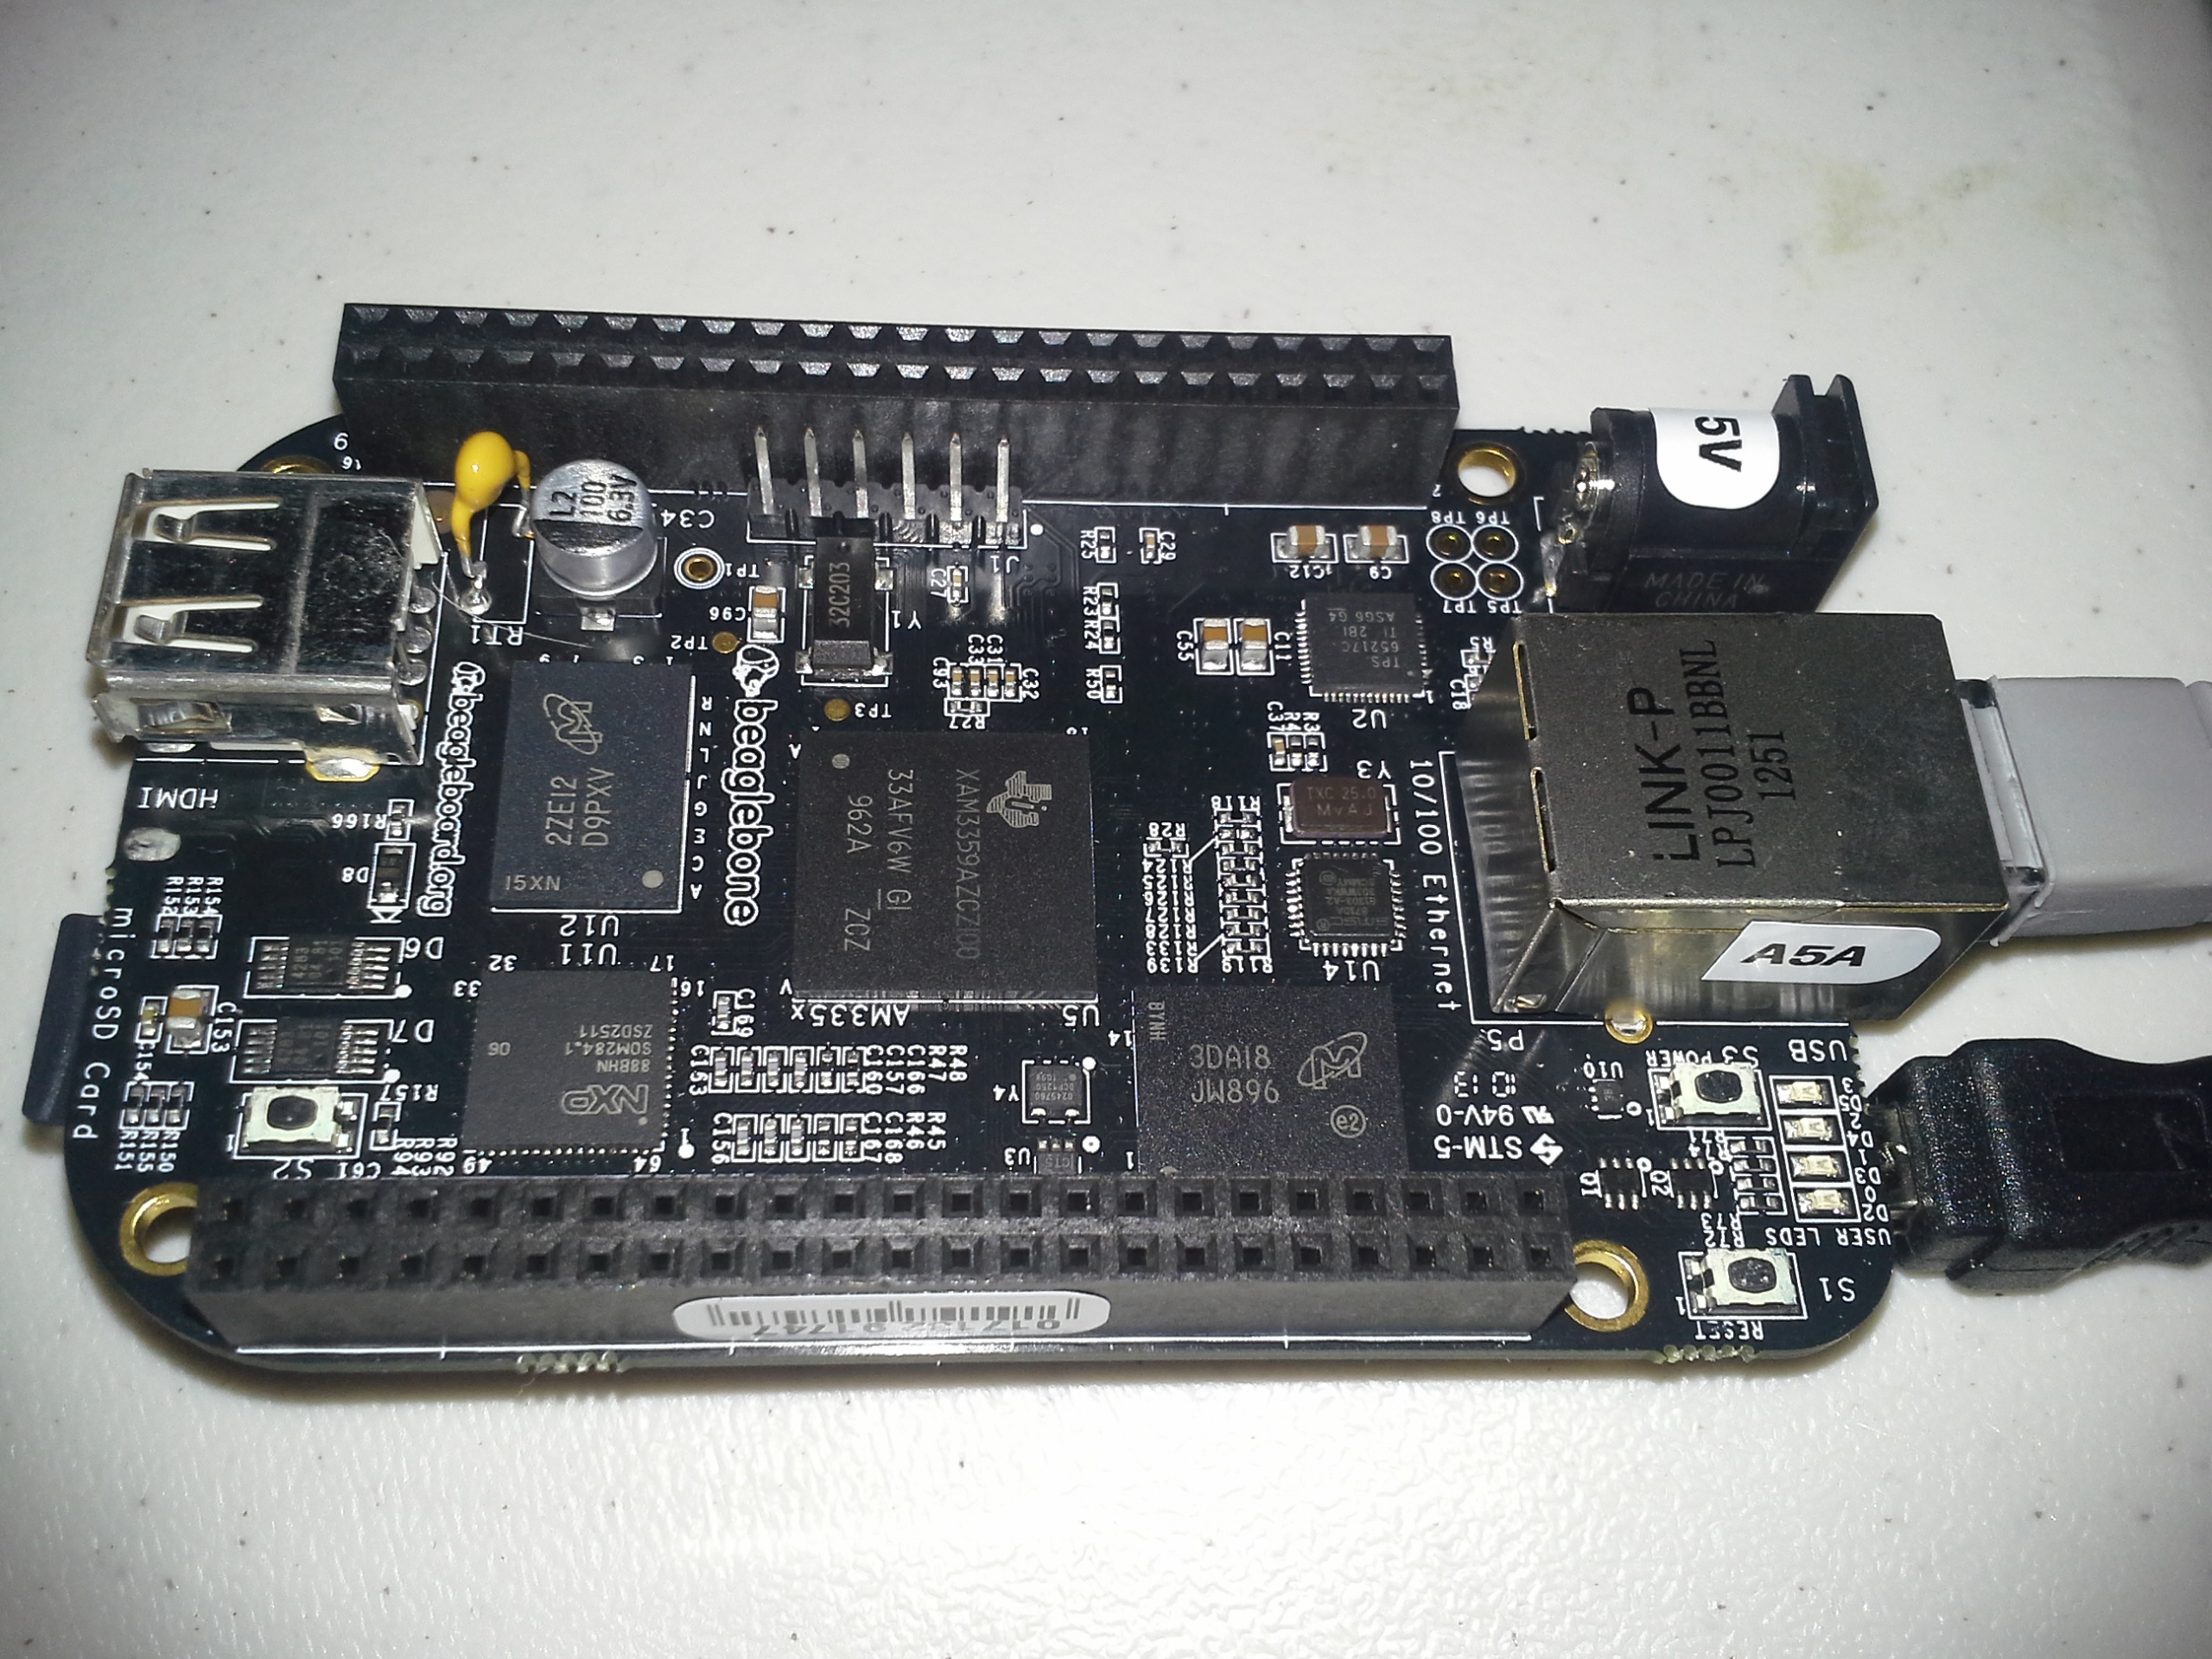 The BeagleBone Black is significantly faster and more capable than the comperable $35 Raspberry Pi Model B. Both have the same RAM, HDMI out, and Ethernet, but the BeagleBone Black has superior IO (more and faster) and has a faster processor capable of running Ubuntu, where the Raspberry Pi cannot due to its older architecture. Remember, Raspberry Pi was intended to be an educational tool to teach kids to program, not to help you hack together a robot. The BBB has two extra processors dedicated to effectively manage the pinouts.
The downside? The pre-installed OS (Angstrom) at this point in time will break if you do a package upgrade. Not only will it never boot again once it finishes updating, but it also uses too much of the /tmp/ filesystem and stalls halfway though. You can run Ubuntu on it, but there isn't much of a point, since it's basically incapable of having a desktop UI or using OpenGL as far as I can tell. There's no reason why it shouldn't be possible. In fact, LXDE and XFCE sort of work. This leads to the bigger problem. The documentation, support, and community behind BeagleBone is nowhere near that of the Raspberry Pi, let alone Arduino (which has the best by far).
Setup
A lof of this information is based on the BeagleBone Ubuntu wiki.
Installing to an SD Card
From a Linux computer that has the target microSD card in, download a recent .tar.xz from this wiki or our upload of the 13.04 image, in case theirs disappears. Then run these bash commands:
tar xJf ubuntu-13.04-console-armhf-2013-05-18.tar.xz
cd ubuntu-13.04-console-armhf-2013-05-18
sudo ./setup_sdcard.sh --mmc /dev/sdd --uboot bone_dtb --svideo-ntsc --swap_file 1024
Be sure to change /dev/sdd to whatever the SD card is on your computer. If you are using a european TV/monitor, you should set it to PAL instead of NTSC. It seems to default to PAL though. If you get flickering, also consider finding a more powerful power supply for the BeagleBone. Supposedly, it needs 500mA of 5V, but it seems to like to have more than that available.
The copy process can take a while - especially the rootfs file sync phase. Be patient.
Boot
 Plug in the microSD card with the contacts facing down. It sticks out about an eigth of an inch when all the way in. It doesn't quite seem to be in all the way, but it is.
Push down the user boot button. Keep it down while plugging it in. The boot button is the button right next to the microSD card slot. After pressing the button while powering on the first time, it will not be necessary again.
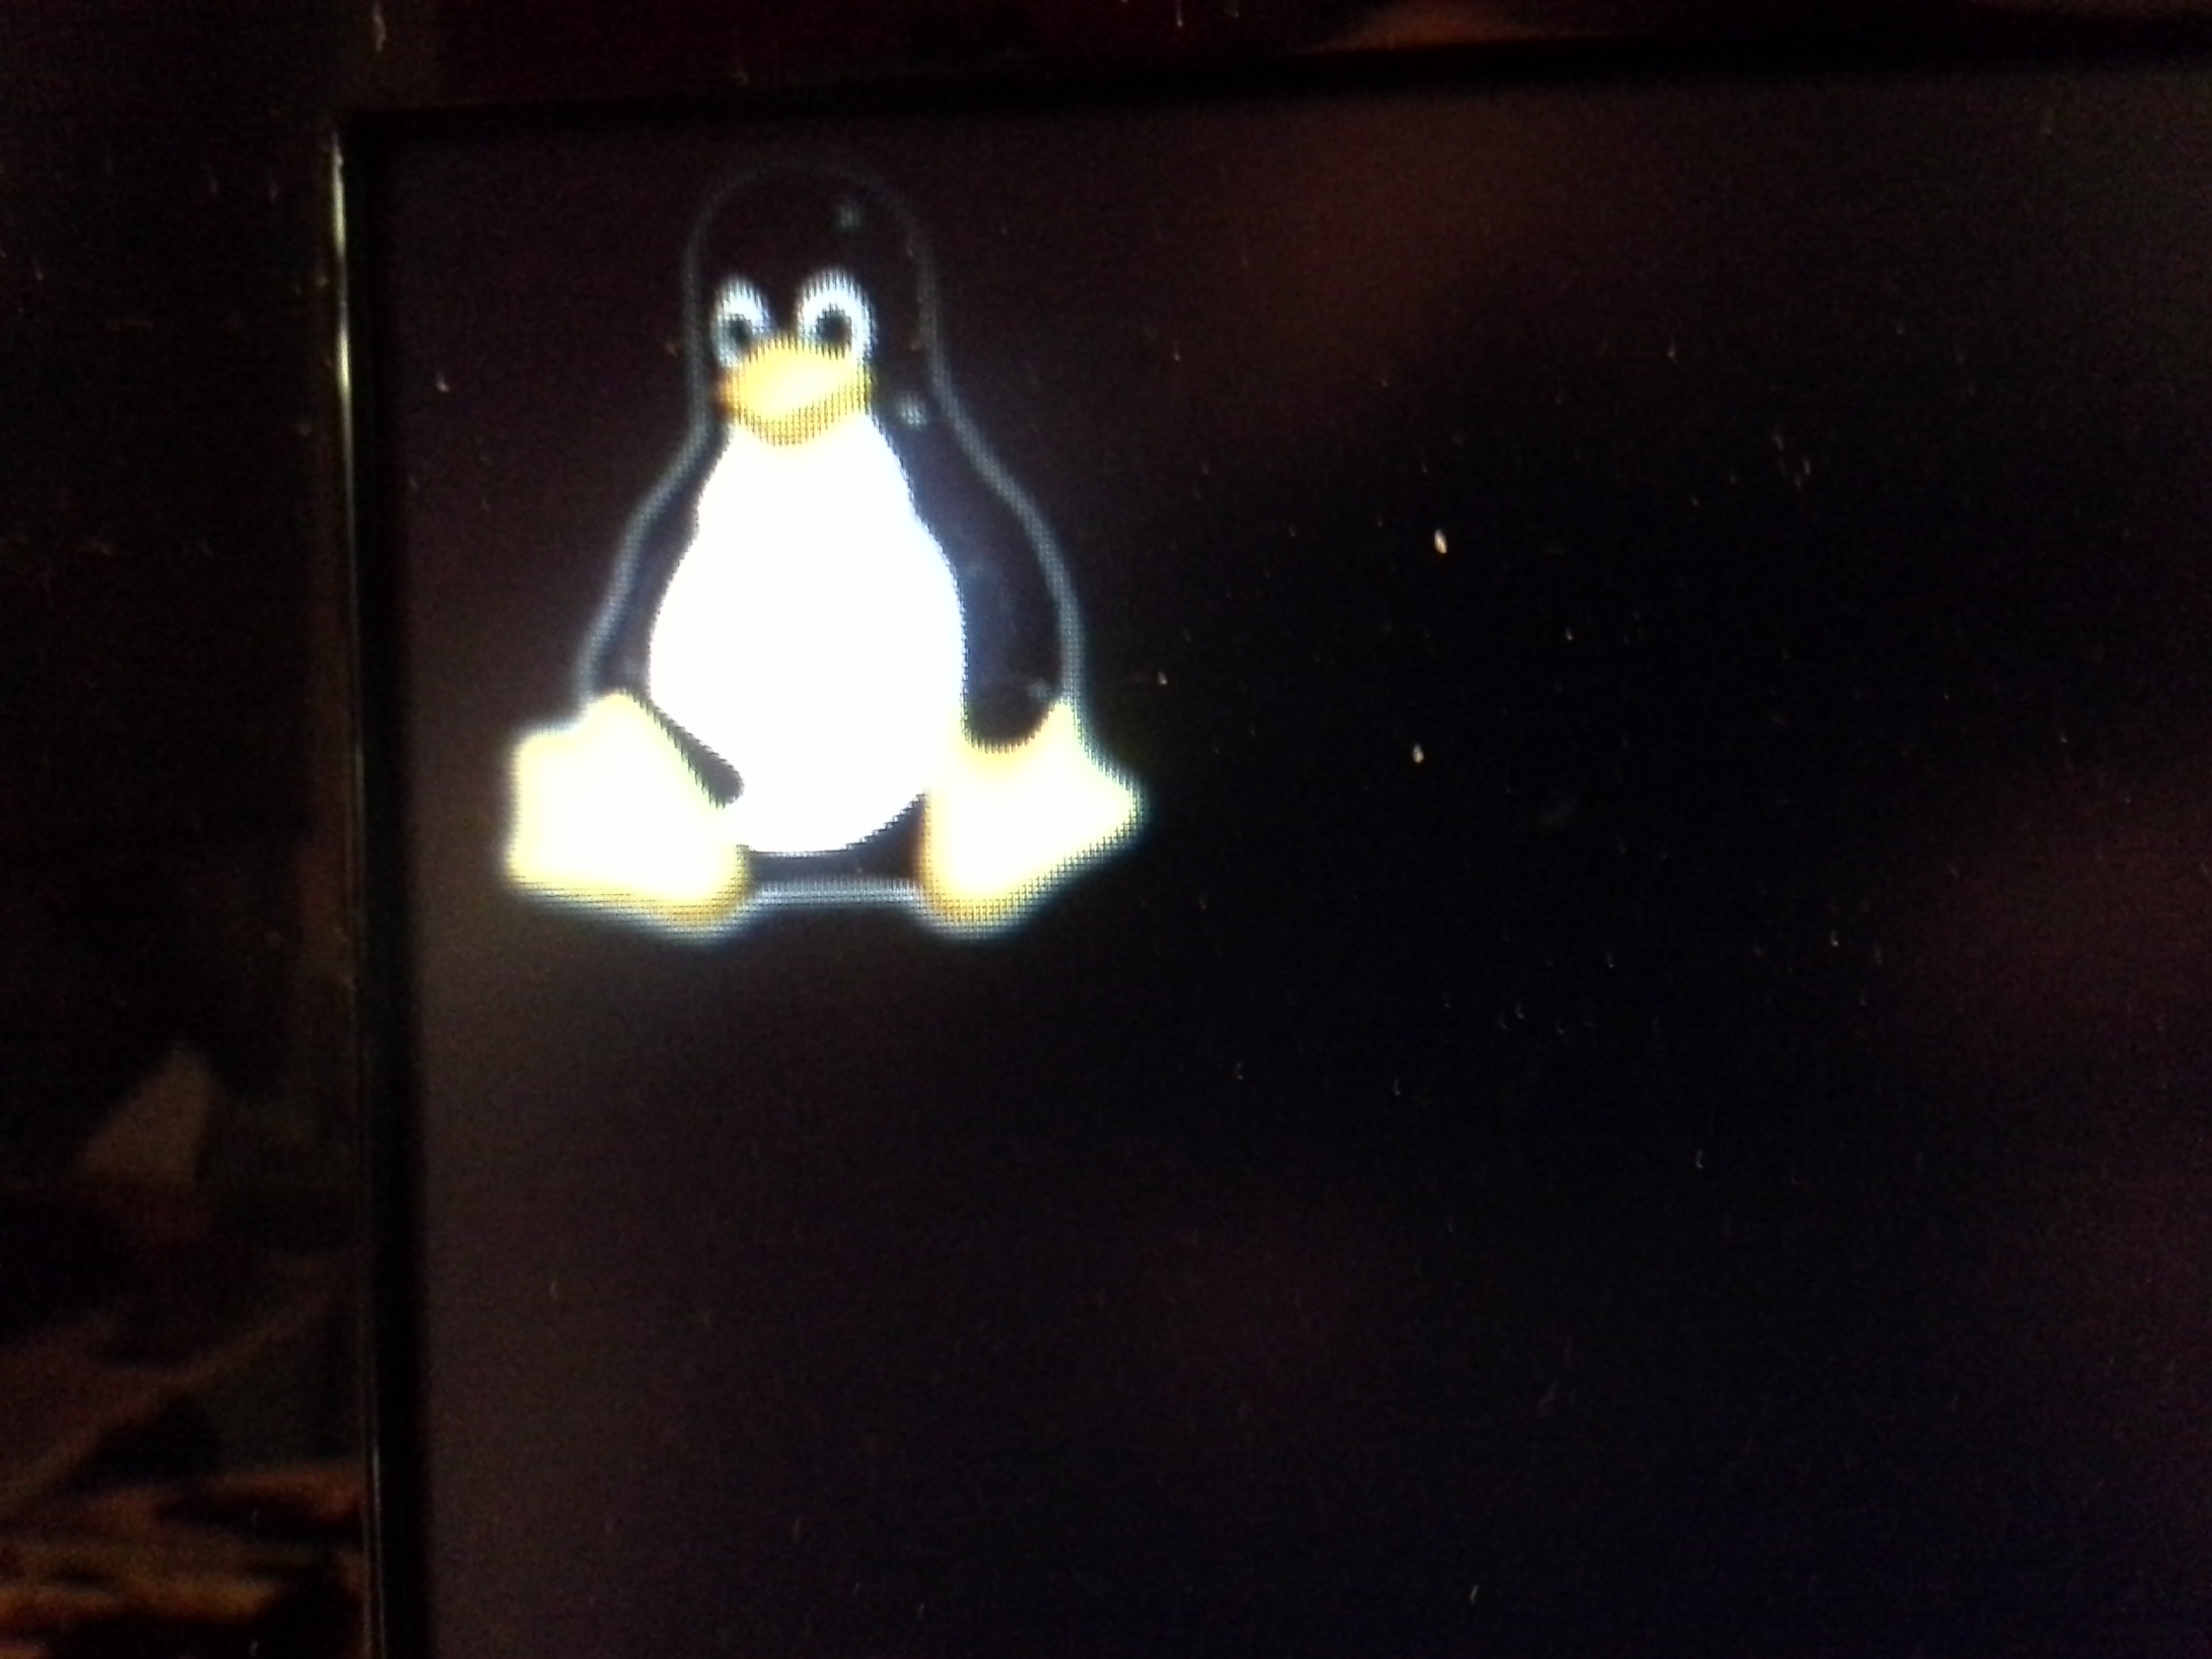
Eventually, you'll see the penguin at the right and you can stop holding the button down. If you pay attention to the LEDs, you can see when the OS is loaded too.
SSH Access
You can either get a keyboard, micro HDMI to HDMI cable, HDMI TV or monitor, and a mini usb power cable, or you can just plug it into a desktop with the mini USB cable.
To access the Ubuntu loaded BeagleBone Black by SSH over USB, use this command:
ssh ubuntu@192.168.7.2
The password will be temppwd. To change the password, just run "passwd" once you log in.
Internet
In order to access the internet do download the extra packages, you'll need to plug in an ethernet cable. Theoretically, you should be able to forward the desktop's connection with a bridge, but it is probably more trouble than it's worth. Network Manager on ubuntu has an easy way to share connections though. "Edit connections..." then edit the BeagleBone's USB connection (probably Wired Connection 2). In the IPv4 tab, change the "method" to "shared". I assume something similar can be done on Windows.
Swapfile
Add a swapfile, if it wasn't by your install process.
sudo mkdir -p /var/cache/swap/
sudo dd if=/dev/zero of=/var/cache/swap/swapfile bs=1M count=1024
sudo chmod 0600 /var/cache/swap/swapfile
sudo mkswap /var/cache/swap/swapfile
sudo swapon /var/cache/swap/swapfile

sudo nano /etc/fstab
/var/cache/swap/swapfile    none    swap    sw    0   0
Install Packages?
There are a few packages provided in the /boot/ directory. They might already be installed, but I think they are not installed by default due to licensing or something.
cd /boot/uboot/tools/pkgs
sudo bash ti-omapconf.sh
sudo bash imx-sdma-firmware.sh
sudo bash ti-omapdrm.sh
sudo bash ti-tidspbridge.sh
sudo bash ti-uim.sh
sudo bash ti-wlink-firmware.sh
XFCE Graphics (Don't Bother)
It's easy to install the graphical environment. It might be impossible to get it to work though. The installation will use up an additional 1 GB of space on top of the default install size of 0.5 GB, so it may not be a great idea to do on a 2GB card.
sudo apt-get update
sudo apt-get install xubuntu-desktop
sudo shutdown -r now
This install takes about an hour, and includes really a full desktop linux desktop. This is probably more than you want.
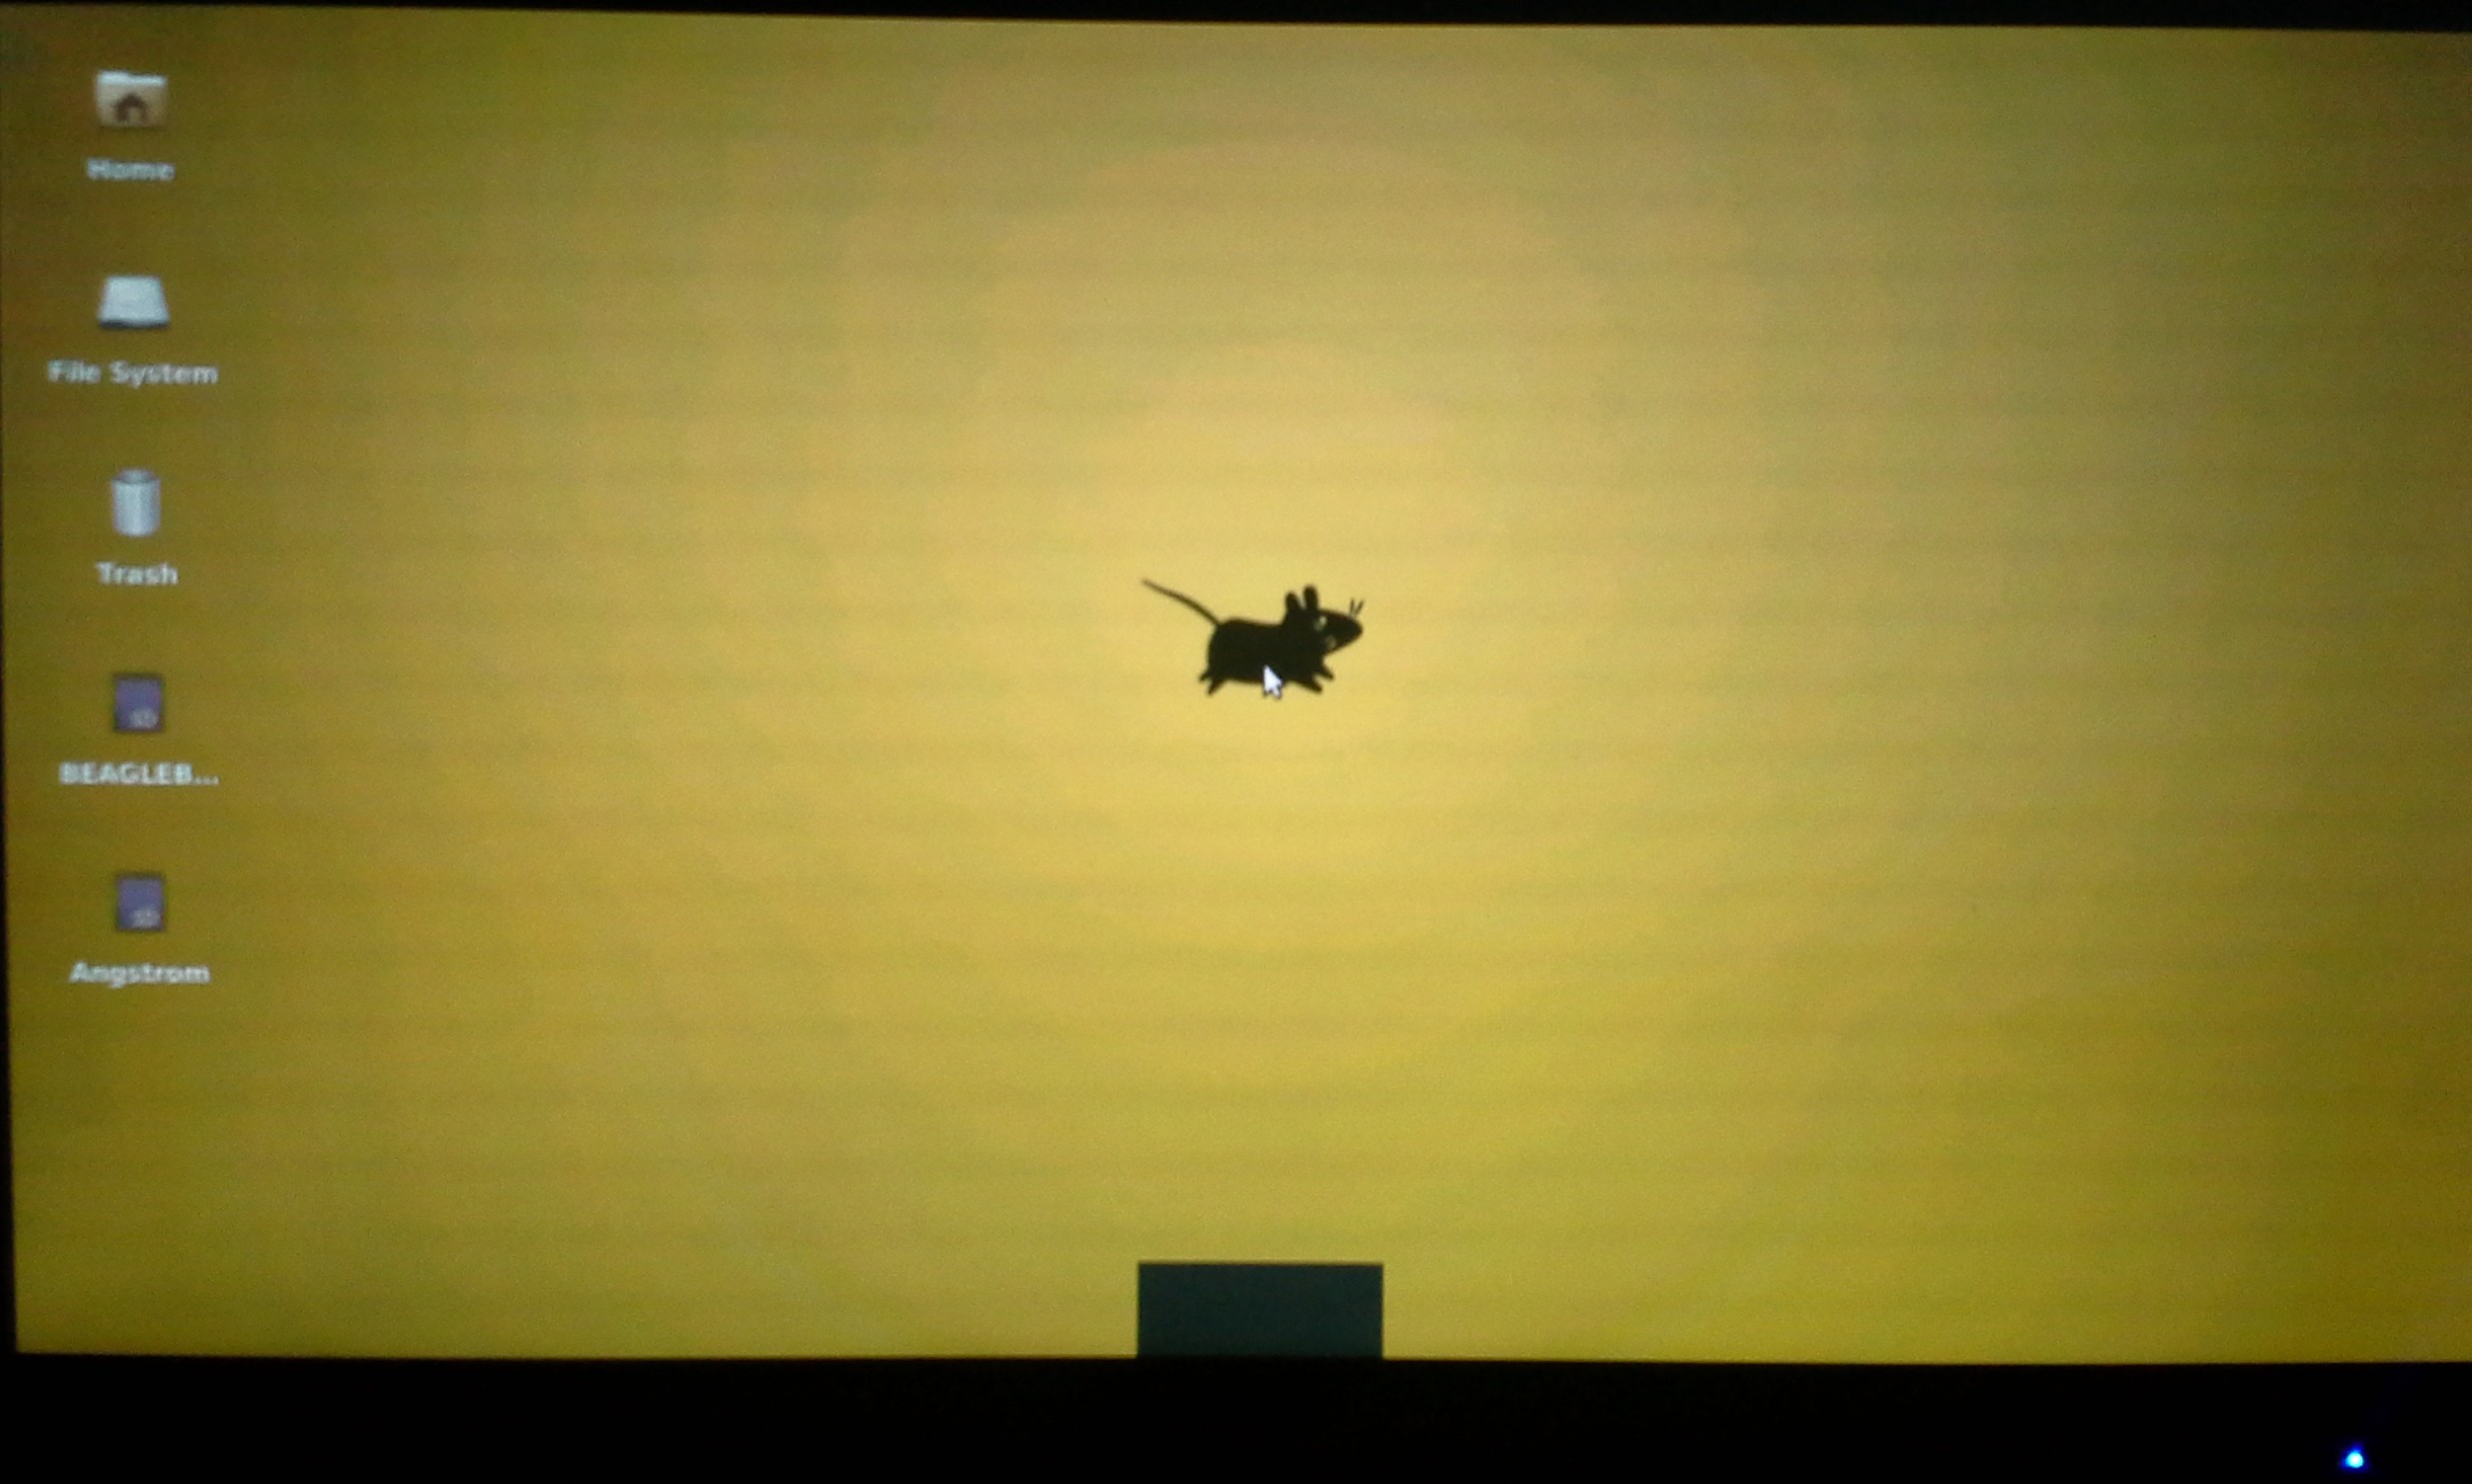 Mine seems to crash after a few seconds of being booted into a graphical environment. It doesn't matter what environment I choose either. I've tried XFCE, LXDE, and Unity under LightDM and LXDM. XFCE comes the closest to staying on the longest. Unity does not work due to a lack of OpenGL. There do not seem to be any drivers for it available yet.
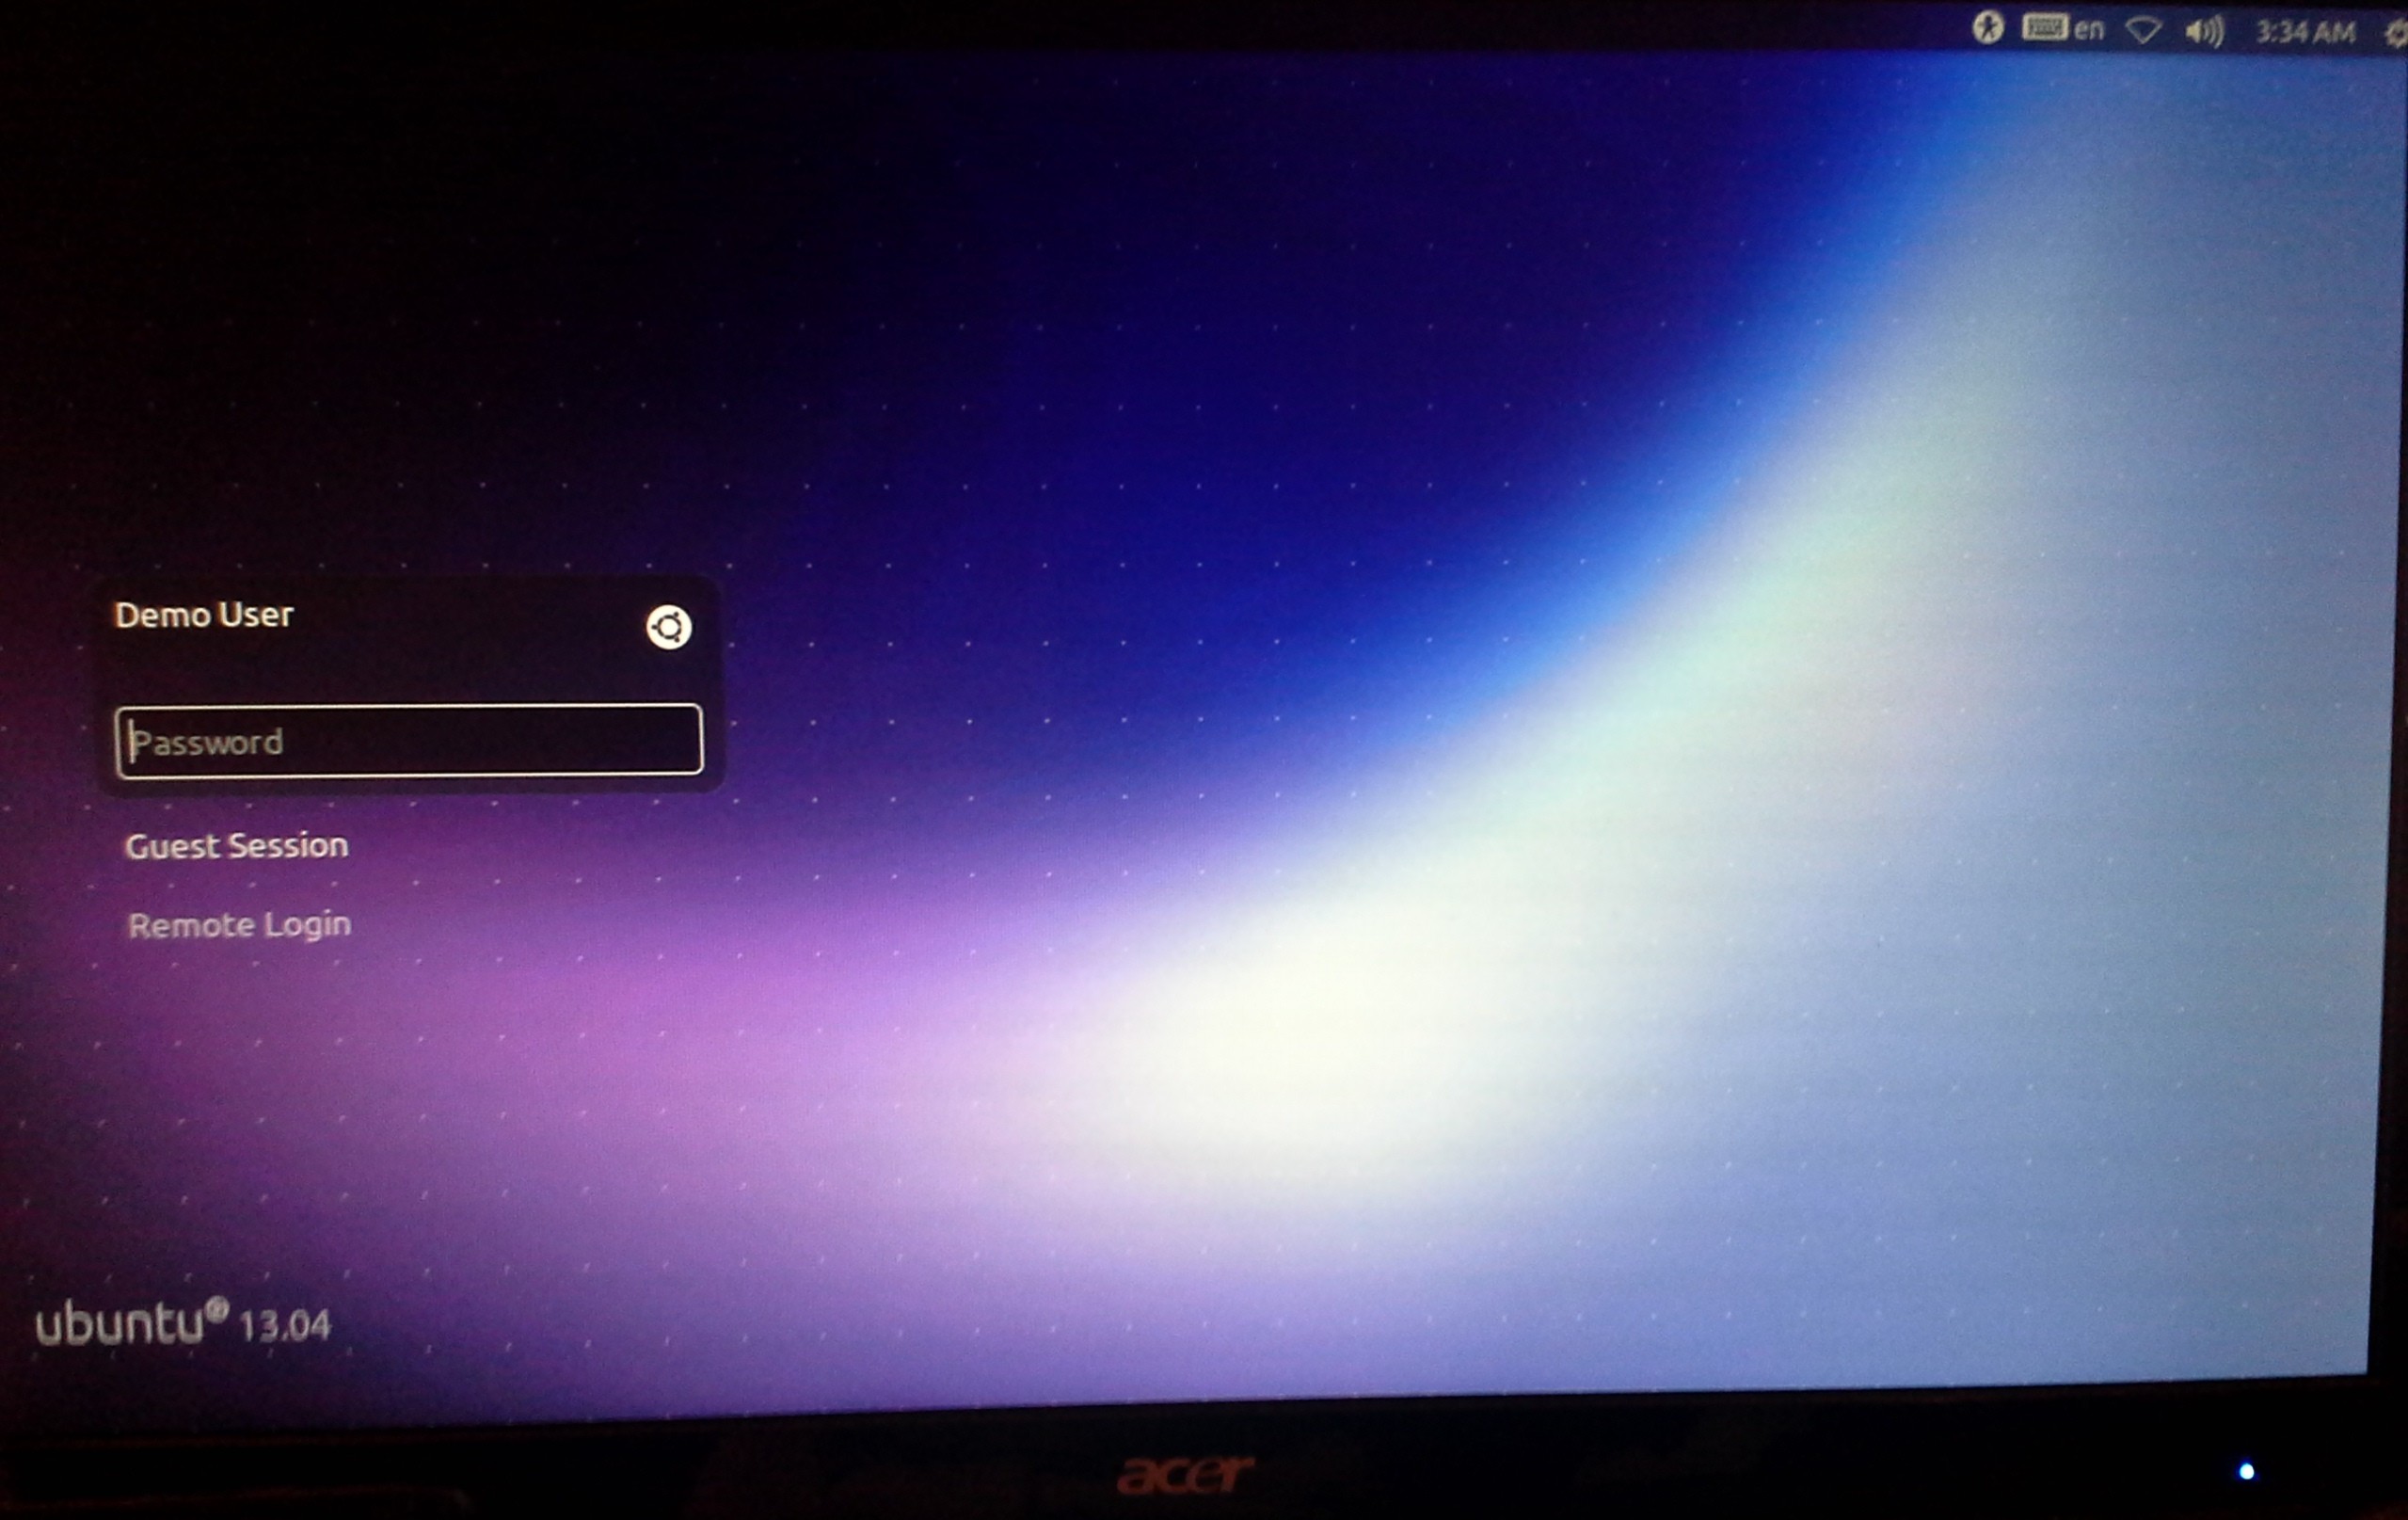 I don't think Unity will work at all, since compiz can't find OpenGL extensions, but the lightdm login will come up, as you can see. Before you get too down on not having a familiar environment, don't worry about it! Just get a good way of syncing between the BeagleBone Black and your desktop. That way you can keep your faster and familiar computing environment and keep your BeagleBone slim and specialized for what you're actually using it for.
Sync
I chose BitTorrent Sync due to the simplicity to set up. It isn't open source, but neither is Dropbox and a lot of us still use it. It is one of the few sync options that offers very easy to install ARM-compatible builds. There is a trick to setting it up though, you have to add a symlink first.
wget http://btsync.s3-website-us-east-1.amazonaws.com/btsync_arm.tar.gz
tar xzf btsync_arm.tar.gz
rm btsync_arm.tar.gz LICENSE.TXT
sudo ln -s /lib/arm-linux-gnueabihf/ld-linux.so.3 /lib/ld-linux.so.3
./btsync
Then just take a browser and visit http://192.168.7.2:8888/ if it is connected by USB, or http//arm.local:8888/ if on LAN.
If you are more concerned about privacy and open source software, maybe check out building your own with rsync, or look at lipsync, which uses rsync and some filesystem monitoring.
Bash Autocomplete
Autocomplete when tab is pressed (practically necessary!). It is for some reason necessary to install it and then reinstall it, which is definitely odd, but whatever.
sudo apt-get install bash-completion
sudo apt-get install --reinstall bash-completion
Locale
Set your locale, so it stops bugging you about it being set to C by default.
sudo nano /etc/default/locale
LANG=en_US.utf8

sudo locale-gen en_US.utf8
Local Bin Folder
Add a home bin directory
mkdir ~/bin
nano ~/.bashrc
#append to the bottom to automatically add home bin to the path
PATH=$PATH:/$HOME/bin/
Dim the Lights
 Put some masking tape or painter's tape over those 4 LED's because they are really annoyingly bright. That might sound like a joke, but if you have it blinking in the corner of your eye non-stop for hours it will actually start to give you a headache. They never stop blinking either. One of them is the Linux Kernel Heartbeat light.
They're brighter than normal LEDs too. Why? Dunno. They're blue? Blue LEDs are usually dimmer though. It's hard to even take a picture of the board while it's on! I really can't believe how rediculously annoying they are...
Alternatively, instead of putting tape over it, you could run this to actually turn them off. That's probably the right way to do this. Really, it's just the heartbeat that's annoying, but you can turn off the rest too if you want.
# just turn off the heartbeat
echo 0 > /sys/class/leds/beaglebone\:green\:usr0/brightness
# get rid of the rest too
echo 0 > /sys/class/leds/beaglebone\:green\:usr1/brightness
echo 0 > /sys/class/leds/beaglebone\:green\:usr2/brightness
echo 0 > /sys/class/leds/beaglebone\:green\:usr3/brightness
If you're worried you won't be able to tell if it crashes, just look at the LAN leds or any of the other 3 indicators. They're always blinking too.
Run a script at startup
So here is a really neat trick:
nano /home/ubuntu/bin/startup.sh#! /bin/bash
echo 0 > /sys/class/leds/beaglebone\:green\:usr0/brightnesschmod +x /home/ubuntu/bin/startup.shsudo su
sudo crontab -e@reboot /bin/bash /home/ubuntu/bin/startup.shIsn't cron cool?
Set Up Python
GPIO is done essentially by just writting and writing to the special /sys/ folder. Check out this github project for a more familiar interface for it.
Allow python to interface with i2c.
sudo apt-get install python-smbus
Benchmarks
Compare the benchmarks to those of the Raspberry Pi (wiki) using this package (zip). Also compare to my Angstrom BBB tests.
Dhrystone
Running whetstone on the Beaglebone Black with Ubuntu compiled with just -O3 yields 3,319,960 dhrystones per second. A Raspberry Pi nets 809,061.5. The BeagleBone was able to do 4.1 times more operations per second. This is also 10% faster than the same BeagleBone Black with Angstrom, the default Linux distrobution, which ran at 3,059,570. The same test ran on a desktop computer with an AMD Phenom II x4 965 gets around 25,062,657. That's more 10% of a pretty powerful desktop, which I think is somewhat impressive.
gcc dhry_1.c dhry_2.c dhry.h cpuidc.c -lm  -O3 -o dhry
./dhry
##########################################

Dhrystone Benchmark, Version 2.1 (Language: C or C++)

Optimisation    Opt 3 32 Bit
Register option not selected

       10000 runs   0.01 seconds
      100000 runs   0.10 seconds
      200000 runs   0.20 seconds
      400000 runs   0.21 seconds
      800000 runs   0.24 seconds
     1600000 runs   0.48 seconds
     3200000 runs   0.96 seconds
     6400000 runs   1.93 seconds
    12800000 runs   3.86 seconds

Final values (* implementation-dependent):

Int_Glob:      O.K.  5  Bool_Glob:     O.K.  1
Ch_1_Glob:     O.K.  A  Ch_2_Glob:     O.K.  B
Arr_1_Glob[8]: O.K.  7  Arr_2_Glob8/7: O.K.    12800010
Ptr_Glob->              Ptr_Comp:       *    94584
  Discr:       O.K.  0  Enum_Comp:     O.K.  2
  Int_Comp:    O.K.  17 Str_Comp:      O.K.  DHRYSTONE PROGRAM, SOME STRING
Next_Ptr_Glob->         Ptr_Comp:       *    94584 same as above
  Discr:       O.K.  0  Enum_Comp:     O.K.  1
  Int_Comp:    O.K.  18 Str_Comp:      O.K.  DHRYSTONE PROGRAM, SOME STRING
Int_1_Loc:     O.K.  5  Int_2_Loc:     O.K.  13
Int_3_Loc:     O.K.  7  Enum_Loc:      O.K.  1
Str_1_Loc:                             O.K.  DHRYSTONE PROGRAM, 1'ST STRING
Str_2_Loc:                             O.K.  DHRYSTONE PROGRAM, 2'ND STRING


From File /proc/cpuinfo
processor	: 0
model name	: ARMv7 Processor rev 2 (v7l)
BogoMIPS	: 198.72
Features	: swp half thumb fastmult vfp edsp thumbee neon vfpv3 tls
CPU implementer	: 0x41
CPU architecture: 7
CPU variant	: 0x3
CPU part	: 0xc08
CPU revision	: 2

Hardware	: Generic AM33XX (Flattened Device Tree)
Revision	: 0000
Serial		: 0000000000000000


From File /proc/version
Linux version 3.8.13-bone18 (root@imx6q-sabrelite-1gb) (gcc version 4.7.3 (Ubuntu/Linaro 4.7.3-1ubuntu1) ) #1 SMP Thu May 16 21:04:48 UTC 2013


Nanoseconds one Dhrystone run:       301.21
Dhrystones per Second:              3319960
VAX  MIPS rating =                  1889.56
OpenSSL
This benchmark shows numbers that are 2-10x faster than those on the Raspberry Pi . However, Angstrom is faster by about 10%. The difference? Perhaps this package has no NEON FPU optimizations on Ubuntu. I also believe the BeagleBone has a special cryptography processor which might not be taken advantage of in this test. The Dhrystone test was compiled, this OpenSSL and is probably missing some optimization argument that the Angstrom package had.
OpenSSL 1.0.1c 10 May 2012
built on: Tue Mar 19 19:30:47 UTC 2013
options:bn(64,32) rc4(ptr,char) des(idx,cisc,16,long) aes(partial) blowfish(ptr)
compiler: cc -fPIC -DOPENSSL_PIC -DZLIB -DOPENSSL_THREADS -D_REENTRANT -DDSO_DLFCN -DHAVE_DLFCN_H -DL_ENDIAN -DTERMIO -g -O2 -fstack-protector --param=ssp-buffer-size=4 -Wformat -Werror=format-security -D_FORTIFY_SOURCE=2 -Wl,-Bsymbolic-functions -Wl,-z,relro -Wa,--noexecstack -Wall -DOPENSSL_NO_TLS1_2_CLIENT -DOPENSSL_MAX_TLS1_2_CIPHER_LENGTH=50 -DOPENSSL_BN_ASM_MONT -DOPENSSL_BN_ASM_GF2m -DSHA1_ASM -DSHA256_ASM -DSHA512_ASM -DAES_ASM -DGHASH_ASM
The 'numbers' are in 1000s of bytes per second processed.
type             16 bytes     64 bytes    256 bytes   1024 bytes   8192 bytes
md2                  0.00         0.00         0.00         0.00         0.00
mdc2                 0.00         0.00         0.00         0.00         0.00
md4               7130.44k    28511.10k    79135.70k   142166.02k   185522.60k
md5               6735.29k    22954.62k    61948.74k   107186.00k   136339.07k
hmac(md5)         6964.12k    23296.17k    62451.29k   107847.13k   136203.64k
sha1              6698.12k    20571.23k    46889.18k    69689.54k    81622.11k
rmd160            5756.90k    16751.42k    36409.79k    51751.17k    58911.17k
rc4              64964.35k    72925.41k    76732.39k    77427.41k    77922.96k
des cbc          17184.97k    18237.05k    18618.82k    18752.60k    18739.89k
des ede3          6574.42k     6735.54k     6804.62k     6794.36k     6817.50k
idea cbc             0.00         0.00         0.00         0.00         0.00
seed cbc         21670.10k    22990.09k    23573.99k    23608.01k    23745.80k
rc2 cbc          12701.57k    13378.96k    13576.59k    13579.82k    13613.01k
rc5-32/12 cbc        0.00         0.00         0.00         0.00         0.00
blowfish cbc     27309.24k    29968.99k    30775.05k    31125.82k    31069.32k
cast cbc         26848.41k    29213.50k    30071.18k    30396.65k    30340.54k
aes-128 cbc      37250.31k    40851.65k    42063.71k    42548.23k    42491.55k
aes-192 cbc      31962.79k    34354.75k    35324.32k    35672.31k    35698.43k
aes-256 cbc      28581.52k    30449.05k    31271.64k    31611.70k    31551.61k
camellia-128 cbc    26676.56k    28496.71k    29167.33k    29344.13k    29277.50k
camellia-192 cbc    21532.49k    22621.60k    23114.57k    23195.84k    23143.08k
camellia-256 cbc    21538.22k    22695.82k    23031.27k    23209.75k    23145.82k
sha256            9965.51k    24221.62k    43539.86k    54826.95k    58500.20k
sha512            4207.69k    16757.43k    25271.78k    35145.54k    39798.78k
whirlpool         1579.78k     3265.95k     5289.78k     6313.06k     6654.97k
aes-128 ige      34714.63k    38142.11k    39508.96k    39855.59k    39798.33k
aes-192 ige      29820.66k    32531.41k    33528.70k    33661.52k    33790.63k
aes-256 ige      27038.57k    29091.23k    29929.06k    30019.98k    30137.21k
ghash            49881.45k    60961.91k    65236.19k    66256.57k    66803.29k
                  sign    verify    sign/s verify/s
rsa  512 bits 0.001070s 0.000107s    934.7   9379.4
rsa 1024 bits 0.006119s 0.000332s    163.4   3009.0
rsa 2048 bits 0.039563s 0.001208s     25.3    827.6
rsa 4096 bits 0.285143s 0.004634s      3.5    215.8
                  sign    verify    sign/s verify/s
dsa  512 bits 0.001092s 0.001191s    915.9    839.5
dsa 1024 bits 0.003264s 0.003762s    306.3    265.8
dsa 2048 bits 0.011669s 0.013505s     85.7     74.0
                              sign    verify    sign/s verify/s
 160 bit ecdsa (secp160r1)   0.0006s   0.0024s   1577.7    416.5
 192 bit ecdsa (nistp192)   0.0008s   0.0033s   1219.0    301.0
 224 bit ecdsa (nistp224)   0.0010s   0.0045s    959.1    224.2
 256 bit ecdsa (nistp256)   0.0013s   0.0058s    770.0    171.2
 384 bit ecdsa (nistp384)   0.0030s   0.0155s    331.5     64.4
 521 bit ecdsa (nistp521)   0.0064s   0.0351s    156.9     28.5
 163 bit ecdsa (nistk163)   0.0020s   0.0067s    495.7    149.8
 233 bit ecdsa (nistk233)   0.0042s   0.0122s    238.0     82.2
 283 bit ecdsa (nistk283)   0.0064s   0.0219s    155.9     45.6
 409 bit ecdsa (nistk409)   0.0171s   0.0488s     58.4     20.5
 571 bit ecdsa (nistk571)   0.0409s   0.1130s     24.4      8.9
 163 bit ecdsa (nistb163)   0.0020s   0.0072s    505.1    138.4
 233 bit ecdsa (nistb233)   0.0042s   0.0134s    239.8     74.5
 283 bit ecdsa (nistb283)   0.0064s   0.0247s    155.1     40.5
 409 bit ecdsa (nistb409)   0.0172s   0.0549s     58.3     18.2
 571 bit ecdsa (nistb571)   0.0410s   0.1288s     24.4      7.8
                              op      op/s
 160 bit ecdh (secp160r1)   0.0020s    501.6
 192 bit ecdh (nistp192)   0.0028s    358.5
 224 bit ecdh (nistp224)   0.0037s    272.1
 256 bit ecdh (nistp256)   0.0050s    201.4
 384 bit ecdh (nistp384)   0.0130s     77.2
 521 bit ecdh (nistp521)   0.0295s     33.9
 163 bit ecdh (nistk163)   0.0033s    301.6
 233 bit ecdh (nistk233)   0.0060s    167.9
 283 bit ecdh (nistk283)   0.0109s     91.5
 409 bit ecdh (nistk409)   0.0241s     41.4
 571 bit ecdh (nistk571)   0.0559s     17.9
 163 bit ecdh (nistb163)   0.0036s    281.4
 233 bit ecdh (nistb233)   0.0066s    152.2
 283 bit ecdh (nistb283)   0.0122s     81.9
 409 bit ecdh (nistb409)   0.0274s     36.5
 571 bit ecdh (nistb571)   0.0638s     15.7
7z
A Raspberry Pi would be expected to run 321 MIPS. Ubuntu BeagleBone gets 502 with the standard package, and 510 if you compile p7zip, showing that compiling is not really worth the effort unless it is a very important library that is proving to be a bottleneck for you.
ubuntu@arm:~$ 7z b

7-Zip 9.20  Copyright (c) 1999-2010 Igor Pavlov  2010-11-18
p7zip Version 9.20 (locale=en_US.utf8,Utf16=on,HugeFiles=on,1 CPU)

RAM size:     495 MB,  # CPU hardware threads:   1
RAM usage:    419 MB,  # Benchmark threads:      1

Dict        Compressing          |        Decompressing
      Speed Usage    R/U Rating  |    Speed Usage    R/U Rating
       KB/s     %   MIPS   MIPS  |     KB/s     %   MIPS   MIPS

22:     345    99    341    336  |     7291    99    662    658
23:     329    98    341    336  |     7176    99    661    657
24:     315    98    344    339  |     7061    99    659    655
25:     304    98    354    347  |     6929    99    655    651
----------------------------------------------------------------
Avr:           98    345    339                99    659    655
Tot:           99    502    497
Switching Back to Angstrom
To revert to the default install, the image it shipped with is available here: http://beagleboard.org/latest-images. I like the one that comes with GNOME though.
# backup
sudo dd if=/dev/sdX bs=8M | xz -c > myBeagleUbuntu.img.xz
# re-image
xz -cd Angstrom-Cloud9-IDE-GNOME-eglibc-ipk-v2012.12-beaglebone-2013.04.13.img.xz > /dev/sdX
BeagleBone Black Built-In LEDs
About each LED
There are four user LEDs on the BeagleBone. You can modify them, but they each have their own purposes by default. USER0 is the closest to the top in the picture at the right, and USER3 is the bottom one closest to the ethernet port.
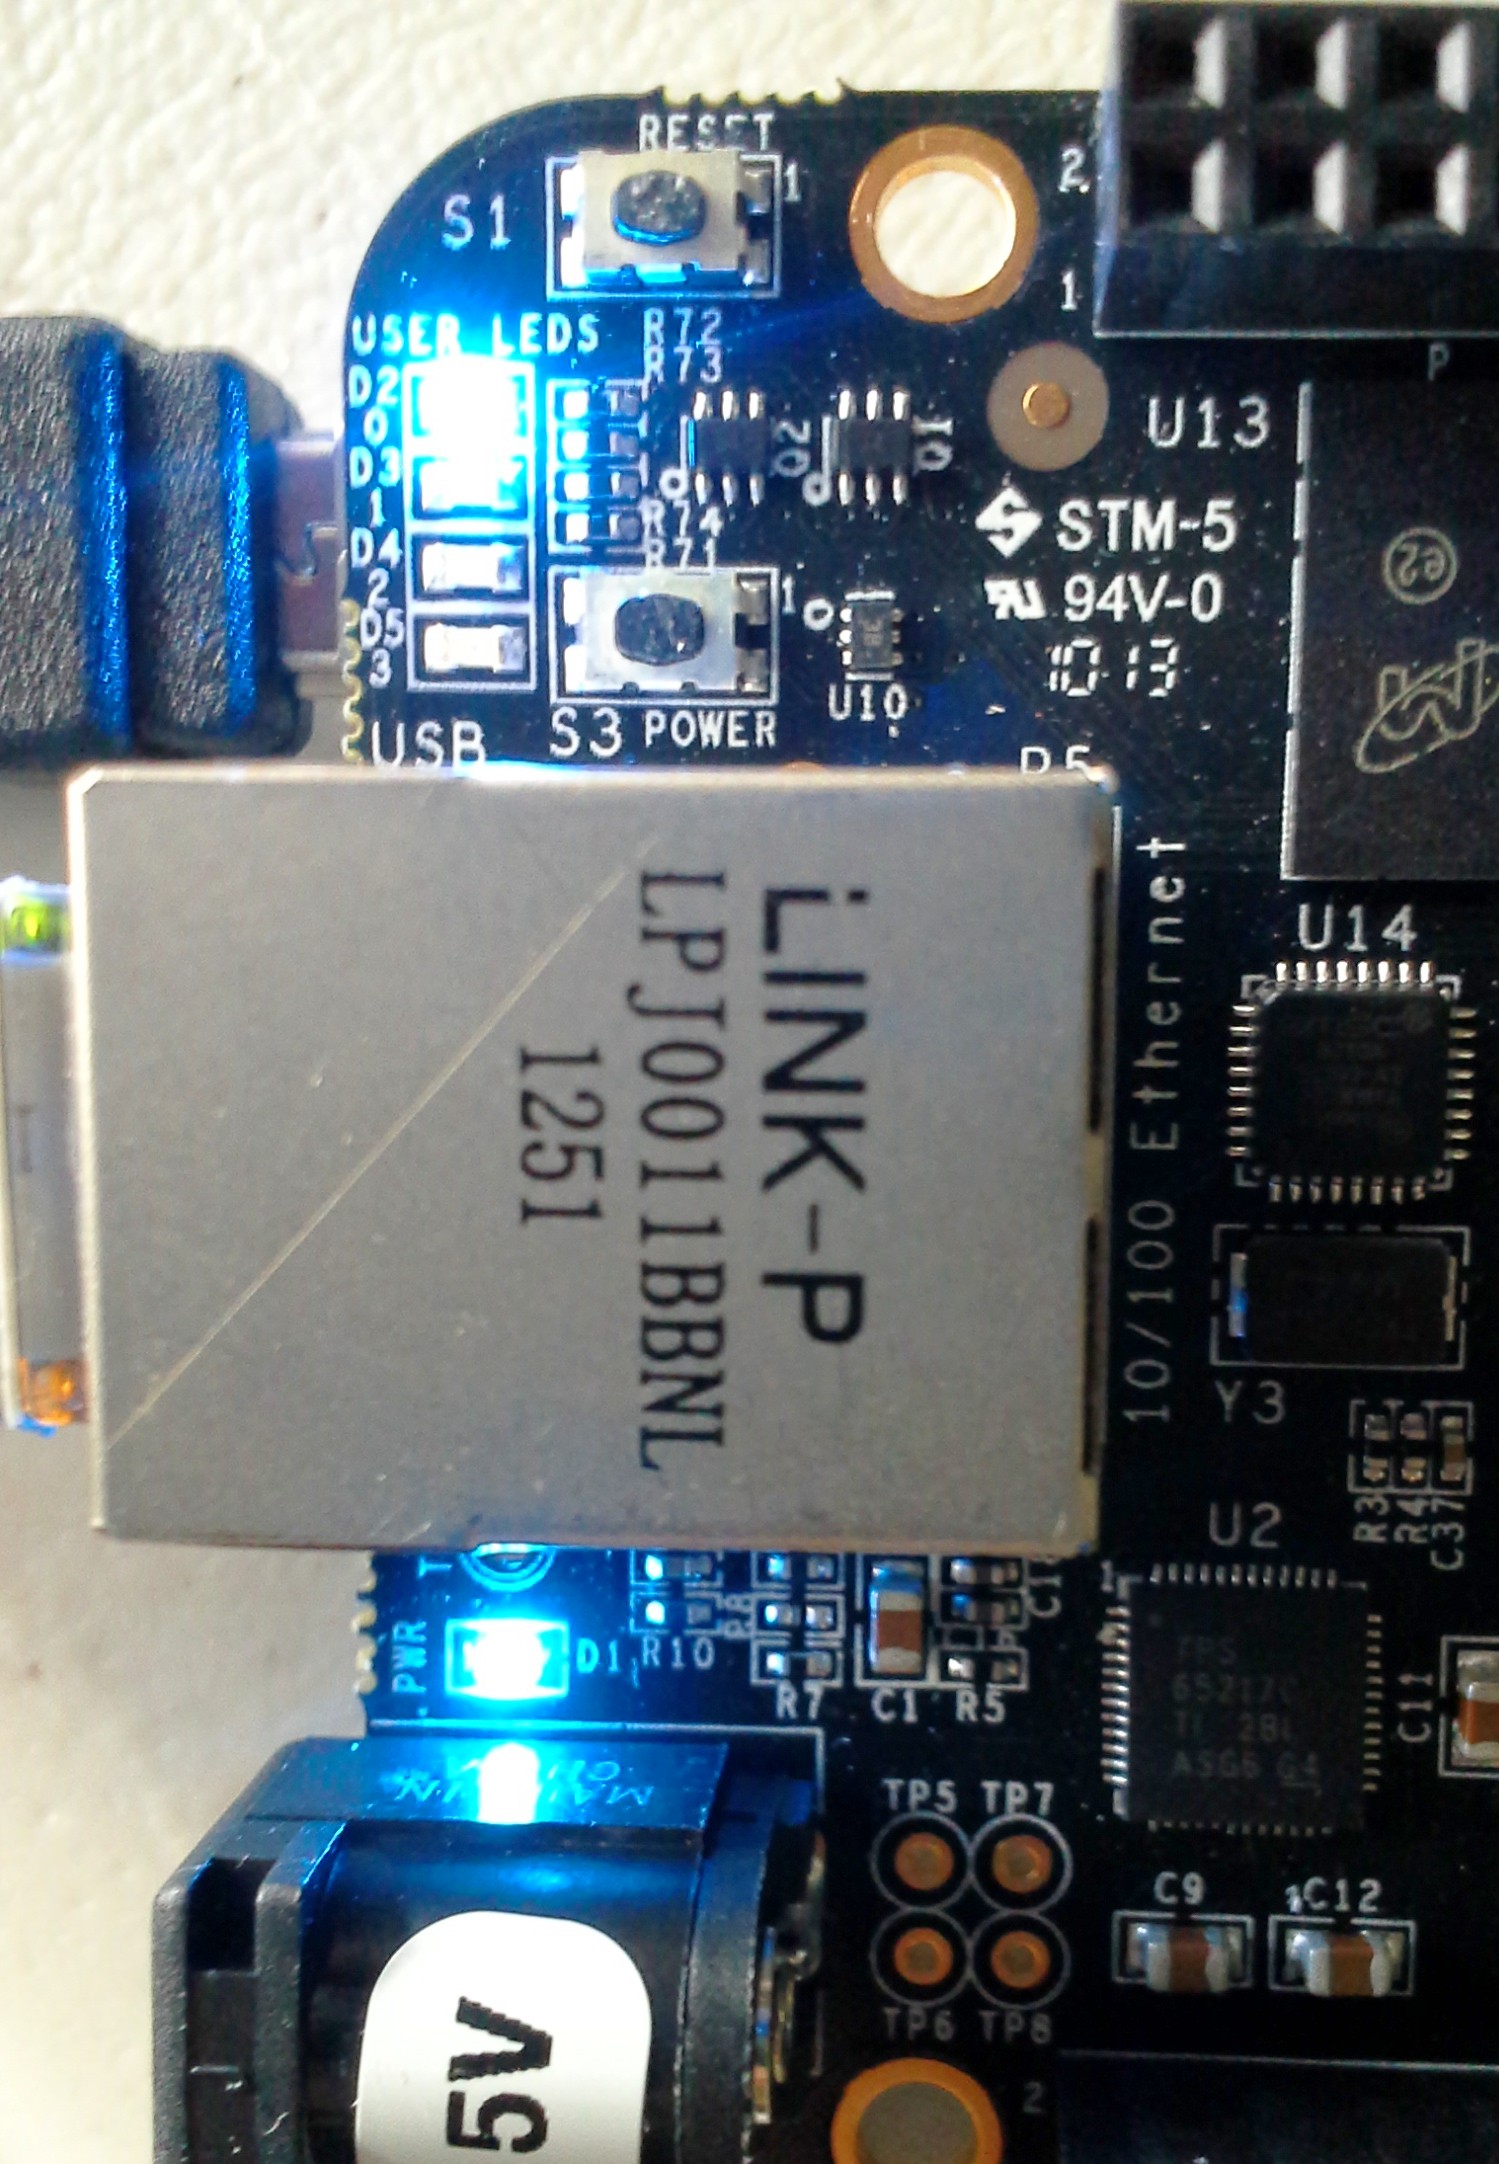
- USER0 is the heartbeat indicator from the Linux kernel.
- USER1 turns on when the SD card is being accessed
- USER2 is an activity indicator. It turns on when the kernel is not in the idle loop.
- USER3 turns on when the onboard eMMC is being accessed.
You can change each of the LED's behaviors at the following locations:
/sys/class/leds/beaglebone\:green\:usr0/
/sys/class/leds/beaglebone\:green\:usr1/
/sys/class/leds/beaglebone\:green\:usr2/
/sys/class/leds/beaglebone\:green\:usr3/
Yeah, the LEDs are blue, but the folder is called green for some reason. Also, those colons make BASH freak out a bit, so pay attention to escape them.
If you explore those directories, things start to get interesting.
First, any write operatoins will require root privileges. The use of IO redirection will require that you be the root account, not just use sudo. This is only really applicable if you are not using Angstrom, where the root account is the default account.
root@beaglebone:~# cd /sys/class/leds/beaglebone\:green\:usr0/
root@beaglebone:/sys/class/leds/beaglebone:green:usr0# ls -l
total 0
-rw-r--r-- 1 root root 4096 Jan  1 00:08 brightness
lrwxrwxrwx 1 root root    0 Jan  1 00:08 device -> ../../../gpio-leds.8
-r--r--r-- 1 root root 4096 Jan  1 00:08 max_brightness
drwxr-xr-x 2 root root    0 Jan  1 00:08 power
lrwxrwxrwx 1 root root    0 Jan  1 00:08 subsystem -> ../../../../../class/leds
-rw-r--r-- 1 root root 4096 Jan  1 00:08 trigger
-rw-r--r-- 1 root root 4096 Jan  1 00:00 uevent

root@beaglebone:/sys/class/leds/beaglebone:green:usr0# cat trigger
none nand-disk mmc0 mmc1 timer oneshot [heartbeat] backlight gpio cpu0 default-on transient
You can see that USER0 is in hearbeat trigger mode. I find that heartbeat to be annoying (it's so bright!). Let's get rid of it
Take Over a USER LED
You can change what LED blinks to indicate by changing the trigger. For example, GPIO would indicate GPIO activity.
In order to change these, you will need to become root by either using sudo bash or sudo su
Sudo alone will not help because of the I/O redirection used in these commands. You could do sudo nano trigger instead.
root@beaglebone:/sys/class/leds/beaglebone:green:usr0# echo none > trigger
root@beaglebone:/sys/class/leds/beaglebone:green:usr0# cat trigger
[none] nand-disk mmc0 mmc1 timer oneshot heartbeat backlight gpio cpu0 default-on transient
root@beaglebone:/sys/class/leds/beaglebone:green:usr0# echo 0 > brightness
Blinking a USER LED
Just a simple BASH loop:
while true; do echo 255 > brightness ; sleep 1; echo 0 > brightness; sleep 1; done;OR you can use the timer built-in trigger
echo timer > trigger
echo 500 > delay_off
echo 50 > delay_on
You can even use it as a sort of PWM to dim the LED. There should be another way to do this, but this is all I've found.
echo timer > trigger
echo 1 > delay_on
echo 12 > delay_off
Interestingly, I think this should behave similar to the heartbeat. If the system crashes it would turn on or off completely.
BeagleBone Black Pins
Pinout Tables
These tables are based on the BeagleBone Black System Reference Manual (Creative Commons) by Gerald Coley of BeagleBoard.org. They aren't really available anywhere else on the internet, so I thought I'd transcribe them into a more available format.
The PROC column is the pin number on the processor.
The PIN column is the pin number on the expansion header.
The MODE columns are the mode setting for each pin. Setting each mode to align with the mode column will give that function on that pin. Each pin's mode can be set individually.
Note that the MODE5 column is absent. That is not a typo. It just doesn't do anything. The only exception is GPIO0_7 in expansion header P9 has a mmc0_sdwp
| PIN | PROC | NAME | MODE0 | MODE1 | MODE2 | MODE3 | MODE4 | MODE6 | MODE7 |
|---|---|---|---|---|---|---|---|---|---|
| 1,2 | GND | ||||||||
| 3 | R9 | GPIO1_6 | gpmc_ad6 | mmc1_dat6 | gpio1[6] | ||||
| 4 | T9 | GPIO1_7 | gpmc_ad7 | mmc1_dat7 | gpio1[7] | ||||
| 5 | R8 | GPIO1_2 | gpmc_ad2 | mmc1_dat2 | gpio1[2] | ||||
| 6 | T8 | GPIO1_3 | gpmc_ad3 | mmc1_dat3 | gpio1[3] | ||||
| 7 | R7 | TIMER4 | gpmc_advn_ale | timer4 | gpio2[2] | ||||
| 8 | T7 | TIMER7 | gpmc_oen_ren | timer7 | gpio2[3] | ||||
| 9 | T6 | TIMER5 | gpmc_be0n_cle | timer5 | gpio2[5] | ||||
| 10 | U6 | TIMER6 | gpmc_wen | timer6 | gpio2[4] | ||||
| 11* | R12 | GPIO1_13 | gpmc_ad13 | lcd_data18 | mmc1_dat5* | mmc2_dat1 | eQEP2B_in | gpio1[13] | |
| 12* | T12 | GPIO1_12 | gpmc_ad12 | lcd_data19 | mmc1_dat4* | mmc2_dat0 | EQEP2A_IN | gpio1[12] | |
| 13* | T10 | EHRPWM2B | gpmc_ad9 | lcd_data22 | mmc1_dat1* | mmc2_dat5 | ehrpwm2B | gpio0[23] | |
| 14* | T11 | GPIO0_26 | gpmc_ad10 | lcd_data21 | mmc1_dat2* | mmc2_dat6 | ehrpwm2_tripzone | gpio0[26] | |
| 15* | U13 | GPIO1_15 | gpmc_ad15 | lcd_data16 | mmc1_dat7* | mmc2_dat3 | eQEP2_strobe | gpio1[15] | |
| 16* | V13 | GPIO1_14 | gpmc_ad14 | lcd_data17 | mmc1_dat6* | mmc2_dat2 | eQEP2_index | gpio1[14] | |
| 17* | U12 | GPIO0_27 | gpmc_ad11 | lcd_data20 | mmc1_dat3* | mmc2_dat7 | ehrpwm0_synco | gpio0[27] | |
| 18 | V12 | GPIO2_1 | gpmc_clk_mux0 | lcd_memory_clk | gpmc_wait1 | mmc2_clk | mcasp0_fsr | gpio2[1] | |
| 19* | U10 | EHRPWM2A | gpmc_ad8 | lcd_data23 | mmc1_dat0* | mmc2_dat4 | ehrpwm2A | gpio0[22] | |
| 20* | V9 | GPIO1_31 | gpmc_csn2 | gpmc_be1n | mmc1_cmd* | gpio1[31] | |||
| 21* | U9 | GPIO1_30 | gpmc_csn1 | gpmc_clk | mmc1_clk* | gpio1[30] | |||
| 22 | V8 | GPIO1_5 | gpmc_ad5 | mmc1_dat5 | gpio1[5] | ||||
| 23 | U8 | GPIO1_4 | gpmc_ad4 | mmc1_dat4 | gpio1[4] | ||||
| 24 | V7 | GPIO1_1 | gpmc_ad1 | mmc1_dat1 | gpio1[1] | ||||
| 25 | U7 | GPIO1_0 | gpmc_ad0 | mmc1_dat0 | gpio1[0] | ||||
| 26 | V6 | GPIO1_29 | gpmc_csn0 | gpio1[29] | |||||
| 27* | U5 | GPIO2_22 | lcd_vsync* | gpmc_a8 | gpio2[22] | ||||
| 28* | V5 | GPIO2_24 | lcd_pclk* | gpmc_a10 | gpio2[24] | ||||
| 29* | R5 | GPIO2_23 | lcd_hsync* | gpmc_a9 | gpio2[23] | ||||
| 30* | R6 | GPIO2_25 | lcd_ac_bias_en* | gpmc_a11 | gpio2[25] | ||||
| 31* | V4 | UART5_CTSN | lcd_data14* | gpmc_a18 | eQEP1_index | mcasp0_axr1 | uart5_rxd | uart5_ctsn | gpio0[10] |
| 32* | T5 | UART5_RTSN | lcd_data15* | gpmc_a19 | eQEP1_strobe | mcasp0_ahclkx | mcasp0_axr3 | uart5_rtsn | gpio0[11] |
| 33* | V3 | UART4_RTSN | lcd_data13* | gpmc_a17 | eQEP1B_in | mcasp0_fsr | mcasp0_axr3 | uart4_rtsn | gpio0[9] |
| 34* | U4 | UART3_RTSN | lcd_data11* | gpmc_a15 | ehrpwm1B | mcasp0_ahclkr | mcasp0_axr2 | uart3_rtsn | gpio2[17] |
| 35* | V2 | UART4_CTSN | lcd_data12* | gpmc_a16 | eQEP1A_in | mcasp0_aclkr | mcasp0_axr2 | uart4_ctsn | gpio0[8] |
| 36* | U3 | UART3_CTSN | lcd_data10* | gpmc_a14 | ehrpwm1A | mcasp0_axr0 | uart3_ctsn | gpio2[16] | |
| 37* | U1 | UART5_TXD | lcd_data8* | gpmc_a12 | ehrpwm1_tripzone | mcasp0_aclkx | uart5_txd | uart2_ctsn | gpio2[14] |
| 38* | U2 | UART5_RXD | lcd_data9* | gpmc_a13 | ehrpwm0_synco | mcasp0_fsx | uart5_rxd | uart2_rtsn | gpio2[15] |
| 39* | T3 | GPIO2_12 | lcd_data6* | gpmc_a6 | eQEP2_index | gpio2[12] | |||
| 40* | T4 | GPIO2_13 | lcd_data7* | gpmc_a7 | eQEP2_strobe | pr1_edio_data_out7 | gpio2[13] | ||
| 41* | T1 | GPIO2_10 | lcd_data4* | gpmc_a4 | eQEP2A_in | gpio2[10] | |||
| 42* | T2 | GPIO2_11 | lcd_data5* | gpmc_a5 | eQEP2B_in | gpio2[11] | |||
| 43* | R3 | GPIO2_8 | lcd_data2* | gpmc_a2 | ehrpwm2_tripzone | gpio2[8] | |||
| 44* | R4 | GPIO2_9 | lcd_data3* | gpmc_a3 | ehrpwm0_synco | gpio2[9] | |||
| 45* | R1 | GPIO2_6 | lcd_data0* | gpmc_a0 | ehrpwm2A | gpio2[6] | |||
| 46* | R2 | GPIO2_7 | lcd_data1* | gpmc_a1 | ehrpwm2B | gpio2[7] | |||
* some pins are used by the internal storage (eMMC), and HDMI. 11-21 are used by eMMC. 27-46 are used by HDMI.
| PIN | PROC | NAME | MODE0 | MODE2 | MODE3 | MODE4 | MODE6 | MODE7 |
|---|---|---|---|---|---|---|---|---|
| 1,2 | GND | |||||||
| 3,4 | DC_3.3V | |||||||
| 5,6 | VDD_5V | |||||||
| 7,8 | SYS_5V | |||||||
| 9 | PWR_BUT | |||||||
| 10 | A10 | RESET_OUT | ||||||
| 11 | T17 | gpmc_wait0 | mii2_crs | gpmc_csn4 | rmii2_crs_dv | mmc1_sdcd | uart4_rxd_mux2 | gpio0[30] |
| 12 | U18 | gpmc_be1n | mii2_col | gpmc_csn6 | mmc2_dat3 | gpmc_dir | mcasp0_aclkr_mux3 | gpio1[28] |
| 13 | U17 | gpmc_wpn | mii2_rxerr | gpmc_csn5 | rmii2_rxerr | mmc2_sdcd | uart4_txd_mux2 | gpio0[31] |
| 14 | U14 | gpmc_a2 | mii2_txd3 | rgmii2_td3 | mmc2_dat1 | gpmc_a18 | ehrpwm1A_mux1 | gpio1[18] |
| 15 | R13 | gpmc_a0 | gmii2_txen | rmii2_tctl | mii2_txen | gpmc_a16 | ehrpwm1_tripzone | gpio1[16] |
| 16 | T14 | gpmc_a3 | mii2_txd2 | rgmii2_td2 | mmc2_dat2 | gpmc_a19 | ehrpwm1B_mux1 | gpio1[19] |
| 17 | A16 | spi0_cs0 | mmc2_sdwp | I2C1_SCL | ehrpwm0_synci | gpio0[5] | ||
| 18 | B16 | spi0_d1 | mmc1_sdwp | I2C1_SDA | ehrpwm0_tripzone | gpio0[4] | ||
| 19 | D17 | uart1_rtsn | timer5 | dcan0_rx | I2C2_SCL | spi1_cs1 | gpio0[13] | |
| 20 | D18 | uart1_ctsn | timer6 | dcan0_tx | I2C2_SDA | spi1_cs0 | gpio0[12] | |
| 21 | B17 | spi0_d0 | uart2_txd | I2C2_SCL | ehrpwm0B | EMU3_mux1 | gpio0[3] | |
| 22 | A17 | spi0_sclk | uart2_rxd | I2C2_SDA | ehrpwm0A | EMU2_mux1 | gpio0[2] | |
| 23 | V14 | gpmc_a1 | gmii2_rxdv | rgmii2_rxdv | mmc2_dat0 | gpmc_a17 | ehrpwm0_synco | gpio1[17] |
| 24 | D15 | uart1_txd | mmc2_sdwp | dcan1_rx | I2C1_SCL | gpio0[15] | ||
| 25 | A14 | mcasp0_ahclkx | eQEP0_strobe | mcasp0_axr3 | mcasp1_axr1 | EMU4_mux2 | gpio3[21] | |
| 26 | D16 | uart1_rxd | mmc1_sdwp | dcan1_tx | I2C1_SDA | gpio0[14] | ||
| 27 | C13 | mcasp0_fsr | eQEP0B_in | mcasp0_axr3 | mcasp1_fsx | EMU2_mux2 | gpio3[19] | |
| 28 | C12 | mcasp0_ahclkr | ehrpwm0_synci | mcasp0_axr2 | spi1_cs0 | eCAP2_in_PWM2_out | gpio3[17] | |
| 29 | B13 | mcasp0_fsx | ehrpwm0B | spi1_d0 | mmc1_sdcd_mux1 | gpio3[15] | ||
| 30 | D12 | mcasp0_axr0 | ehrpwm0_tripzone | spi1_d1 | mmc2_sdcd_mux1 | gpio3[16] | ||
| 31 | A13 | mcasp0_aclkx | ehrpwm0A | spi1_sclk | mmc0_sdcd_mux1 | gpio3[14] | ||
| 32 | VADC | |||||||
| 33 | C8 | AIN4 | ||||||
| 34 | AGND | |||||||
| 35 | A8 | AIN6 | ||||||
| 36 | B8 | AIN5 | ||||||
| 37 | B7 | AIN2 | ||||||
| 38 | A7 | AIN3 | ||||||
| 39 | B6 | AIN0 | ||||||
| 40 | C7 | AIN1 | ||||||
| 41# | D14 | xdma_event_intr1 | tclkin | clkout2 | timer7_mux1 | EMU3_mux0 | gpio0[20] | |
| D13 | mcasp0_axr1 | eQEP0_index | Mcasp1_axr0 | emu3 | gpio3[20] | |||
| 42@ | C18 | eCAP0_in_PWM0_out | uart3_txd | spi1_cs1 | pr1_ecap0_ecap _capin_apwm_o | spi1_sclk | xdma_event_intr2 | gpio0[7] |
| B12 | Mcasp0_aclkr | eQEP0A_in | Mcaspo_axr2 | Mcasp1_aclkx | gpio3[18] | |||
Selecting Modes
Using the "everything is a file" sys directory, you can use BASH or whatever to change the mode number for the pin in the NAME column.
echo 7 > /sys/kernel/debug/omap_mux/gpmc_ad4
echo 36 > /sys/class/gpio/export
echo out > /sys/class/gpio/gpio32/direction
echo 1 > /sys/class/gpio/gpio32/value
If you are using windows, TI has this GUI you can use called PinMuxTool / Pin Mux Utility. The BBB is AM335x r2 based.
The above only works if you're using the older kernel. The new 3.8 based kernel is missing this nifty pin mux feature. However, you can still check what they're muxed at even if you can't change them easily at runtime by looking at
/sys/kernel/debug/pinctrl/44e10800.pinmux/pingroupsroot@arm:/sys/kernel/debug/pinctrl/44e10800.pinmux# cat pingroups
registered pin groups:
group: pinmux_userled_pins
pin 21 (44e10854)
pin 22 (44e10858)
pin 23 (44e1085c)
pin 24 (44e10860)
group: pinmux_rstctl_pins
pin 20 (44e10850)
group: pinmux_i2c0_pins
pin 98 (44e10988)
pin 99 (44e1098c)
group: pinmux_i2c2_pins
pin 94 (44e10978)
pin 95 (44e1097c)
group: pinmux_emmc2_pins
pin 32 (44e10880)
pin 33 (44e10884)
pin 0 (44e10800)
pin 1 (44e10804)
pin 2 (44e10808)
pin 3 (44e1080c)
pin 4 (44e10810)
pin 5 (44e10814)
pin 6 (44e10818)
pin 7 (44e1081c)
group: pinmux_userled_pins
pin 21 (44e10854)
pin 22 (44e10858)
pin 23 (44e1085c)
pin 24 (44e10860)
group: mcasp0_pins
pin 107 (44e109ac)
pin 103 (44e1099c)
pin 101 (44e10994)
pin 100 (44e10990)
pin 106 (44e109a8)
group: nxp_hdmi_bonelt_pins
pin 108 (44e109b0)
pin 40 (44e108a0)
pin 41 (44e108a4)
pin 42 (44e108a8)
pin 43 (44e108ac)
pin 44 (44e108b0)
pin 45 (44e108b4)
pin 46 (44e108b8)
pin 47 (44e108bc)
pin 48 (44e108c0)
pin 49 (44e108c4)
pin 50 (44e108c8)
pin 51 (44e108cc)
pin 52 (44e108d0)
pin 53 (44e108d4)
pin 54 (44e108d8)
pin 55 (44e108dc)
pin 56 (44e108e0)
pin 57 (44e108e4)
pin 58 (44e108e8)
pin 59 (44e108ec)
group: nxp_hdmi_bonelt_off_pins
pin 108 (44e109b0)Check Pin Statuses
root@beaglebone:~# cat /sys/kernel/debug/gpio
GPIOs 0-31, gpio:

GPIOs 32-63, gpio:
 gpio-52  (eMMC_RSTn           ) out lo
 gpio-53  (beaglebone:green:usr) out lo
 gpio-54  (beaglebone:green:usr) out lo
 gpio-55  (beaglebone:green:usr) out hi
 gpio-56  (beaglebone:green:usr) out lo
 gpio-59  (McASP Clock Enable P) out hi

GPIOs 64-95, gpio:

GPIOs 96-127, gpio:
Power Limitations
Be careful about this one, there are some much lower limits than you might be used to
| Pin Type | Maximum Voltage | Maximum Current |
| AIN | 1.8V | |
| GPIO | 3.3V | 4mA - 6mA |
| VDD 3.3 | 3.3V | 250mA |
| VDD 5V | 5V* | 1000mA * |
| SYS 5V | 5V | 250mA |
| VDD ADC | 1.8V | 0? |
| SYS 5V | 5V | 250mA |
* VDD only works when the 5V barrel jack is used
i2c
It is recommended that you use I2C2 on pins 19 and 20 with the /dev/i2c-3 device.
| Mode Name | Port | Physical Pin Number | Block Device |
| I2C1 | P9 | 17 & 18 or 24 & 26 | ? |
| I2C2 | P9 | 19 & 20 or 21 & 22 | /dev/i2c-3 |
To check which i2c interfaces are avaible, check
root@arm:~# ls -l /dev/i2c*
crw-rw---- 1 root i2c 89, 0 Jun  5 04:34 /dev/i2c-0
crw-rw---- 1 root i2c 89, 1 Jun  5 04:34 /dev/i2c-1
To see what addresses are being used, try the i2cdetect command. In the below example, I have a temperature sensor hooked up to pins 19 and 20 that is using 48. Also note that the UU addresses are being used by the system and are unavailable.
root@beaglebone:~# i2cdetect -y -r 3
     0  1  2  3  4  5  6  7  8  9  a  b  c  d  e  f
00:          -- -- -- -- -- -- -- -- -- -- -- -- --
10: -- -- -- -- -- -- -- -- -- -- -- UU -- -- -- --
20: -- -- -- -- -- -- -- -- -- -- -- -- -- -- -- --
30: -- -- -- -- -- -- -- -- -- -- -- -- -- -- -- --
40: -- -- -- -- -- -- -- -- 48 -- -- -- -- -- -- --
50: -- -- -- -- UU UU UU UU -- -- -- -- -- -- -- --
60: -- -- -- -- -- -- -- -- -- -- -- -- -- -- -- --
70: -- -- -- -- -- -- -- --
BeagleBone Internet over USB only
Sure, the BeagleBone and BeagleBone Black come with an ethernet port on them, but why have to get another cable out? You might not even be anywhere near the router. The BeagleBone images automatically do network communcations over USB, as shown by how you can go to 192.168.7.2 from your browser to see the BeagleBone start page and http://192.168.7.2:3000/ to use the Cloud9 editor hosted on the BeagleBone. The problem is that the host computers do not usually relay network traffic to new interfaces. I don't know why not. It would be nice if you could just connect stuff to any connection and it'd always work, but it's not hard to set up NAT and such once you know how to do it. The connection over USB might be slighlty slower than the dedicated connection, since USB is slower and is sharing the connection with things JTAG communication and mass storage. For all I know, though, the ethernet on the BeagleBone is actually controlled by the same USB controller, so it might not be at all different!
On the BeagleBone
ifconfig usb0 192.168.7.2
route add default gw 192.168.7.1
On Linux computer:
sudo su
#eth0 is my internet facing interface, eth3 is the BeagleBone USB connection
ifconfig eth3 192.168.7.1
iptables --table nat --append POSTROUTING --out-interface eth0 -j MASQUERADE
iptables --append FORWARD --in-interface eth3 -j ACCEPT
echo 1 > /proc/sys/net/ipv4/ip_forward
On a Windows computer, I would think you could use the graphical Internet Connection Sharing feature.
BeagleBone Security System
Since the BeagleBone (and the Raspberry Pi) is Linux based, and has usb ports, it is actually very easy (and cheap) to make a security camera system. All you need are USB webcams. Just about any will do. I got four for $16 on Amazon. More expensive ones might say they have higher resolution, but what they are actually reporting is the still photo quality, not streaming video quality. Unless you get a USB 3.0 webcam, which would not be supported by either hobbyist computer, it is impossible to stream HD (1080) video, but some might be able to 720. Even if it were possible, it becomes difficult to store so many photos or videos of that size. So keep it cheap, but make sure it is Linux compatible (UVC/V4L), which can be difficult to find sometimes.
One major limitation of this kind of system is the cord length limit on USB, which is only 2-7 meters (6-17 feet). It should be possible to get around this limitation with the use of hubs and repeaters.
Motion Detection Software
Motion is a great system for security systems. It monitors the camera for any motion and saves pictures or video (or both) only when there is something happening, which is great for saving space.
Installation (BeagleBone)
Motion is actually in the Angstrom package repositories! Why does that surprise me so much? Oh wait. They're for the wrong architecture ARM7a vs ARM7l. Would it work anyway? No idea. Probably best not to try. Ok, so this isn't going to be as easy as it could be. Download the source from the motion homepage by finding a link to it in your web browser and then:
opkg install kernel-module-uvcvideo libavformat-staticdev
ln -s /usr/include/libv4l1-videodev.h /usr/include/linux/videodev.h
ln -s /usr/include/libavformat/avformat.h /usr/include/avformat.h
ln -s /usr/include/libavformat/avio.h /usr/include/avio.h
ln -s /usr/include/libavutil/avstring.h /usr/include/avstring.h
ln -s /usr/include/libavutil/attributes.h /usr/include/attributes.h

wget $URLGOESHERE
tar -xzf motion.tar.gz
#it will probably tell you the time is in the future.
#BeagleBone does not have the correct time. It has no clock.
cd motion-3.2.12/
./configure
make
make install
After all of that, I never got it to compile. I think it might be because the version of ffmpeg currently in the repo is old, but I'm not sure since this seems to have more to do with uvc.
track.c: In function 'uvc_center':
track.c:587:29: error: storage size of 'control_s' isn't known
track.c:589:24: error: 'V4L2_CID_PRIVATE_BASE' undeclared
If you use an older version of motion (3.2.6), you can get a different error involving jpeglib, but it's no easier to figure out.
This is a very good example of why Ubuntu on the BeagleBone is desirable. The installation process on Ubuntu is as easy as it is for the Raspbian (both are Debian based). So, even though I couldn't get it working in Angstrom, it is still possible to use a BeagleBone for this project
Raspberry Pi Installation
Motion is also in the Raspbian package repositories, which is not surprising since it's basically Debian.
sudo apt-get install motionIsn't that easy? Why yes. Yes it is.
Configuration
Motion has a very usable configuration file in /etc/motion/motion.conf. Here are some useful configuration options:
width 640
height 480
framerate 10

# Threshold for number of changed pixels in an image that
threshold 1500

# The quality (in percent) to be used by the jpeg compression (default: 75)
quality 50

# Use ffmpeg to encode mpeg movies in realtime (default: off)
ffmpeg_cap_new on

# Target base directory for pictures and films
target_dir /var/log/security

#break into different folders based on days, not subdivided into hours
jpeg_filename %Y%m%d/camera-%t/motions/%H%M%S-%v%q
movie_filename %Y%m%d/camera-%t/movie/%v-%Y%m%d%H%M%S

# The mini-http server listens to this port for requests (default: 0 = disabled)
webcam_port 8081
# Maximum framerate for webcam streams (default: 1)
webcam_maxrate 10
# Restrict webcam connections to localhost only (default: on)
webcam_localhost off
Saving movies instead of just images turns out to be surprisingly efficient. For example, a day in my setup yielded 7640 images and only 35 movies, which meant 210MB vs 55MB of storage space. So, to save space, "output_motion off" might be a good change. Saving both kinds of motions (video and stills) at 640x480, 2.3GB could be used on a busy day, but with an average of more like 100MB. Obviously, it will depend on how often things move in your cameras' field of view and what you have your threshold set at. In most cases, you will want a large SD card or maybe even an external USB HDD to store these on.
One really cool feature of motion is that it can stream the webcam image over HTTP as an mjpeg. So, by visiting the BeagleBone's address and webcam_port (ex http://beaglebone.local/8081), you can watch the in a browser from somewhere in your own network. However, if you do port forwarding, or the beaglebone has a public IP, you can keep an eye on things from anywhere in the world. It does not, however, have a way to password protect the stream. So keep that in mind before making it public.
Automatic Cleanup
To make sure that the local storage does not fill up, you can delete old data. This can be done automatically based on age using cron and the find program. The following crontab will search for anything over the specified age (in days) and delete it. Note that this does not guarantee that there will be enough disk space. For example, if a few days with lots of motion occur, it could fill up before influx ages enough.
crontab -e
# m h dom mon dow   command
45  1  *   *   * find /var/log/security/ -maxdepth 1 -ctime +145 -exec rm -rf {} \;
# delete anything (non-recursively) in /var/log/security older than 145 days